- What counts as a small slab?
- Plan before you dig
- How much concrete do you need?
- Tools and materials checklist
- Site prep and gravel base
- Building forms that stay true
- Reinforcement, fiber, and vapor barrier
- What mix to order
- Pour day: place, screed, float, finish
- Control joints and edges
- Curing: the step most DIY pours skip
- Worked example: 10 × 12 ft patio pad
- Mistakes that crack small slabs
- Frequently asked questions
Learning how to pour a small concrete slab is less about heroic finishing moves and more about disciplined prep: a flat, compacted base, forms that do not bow, the correct cubic yards on the ticket, and curing that keeps hydration going for days—not hours. Whether you are pouring a 10-foot patio bump-out or a shed pad, the sequence is the same. Measure first, build second, place third, protect last.
This field guide targets slabs you can finish with a small crew (or two determined homeowners) in one truck load. It links to YardPour’s concrete slab calculator for volume, base, and rebar takeoff, and to the general concrete calculator when your pour mixes slabs with other shapes.
What counts as a small slab?
In ready-mix terms, “small” usually means one truck, one finish pass: often 2 to 6 cubic yards, roughly 80 to 400 square feet at 4 inches thick. Examples include:
- AC condenser pads and generator pads
- Shed and greenhouse floors
- Patio extensions and sidewalk landings
- Hot-tub skirts (check manufacturer dead-load requirements separately)
Small does not mean casual. A 4-yard pour that sets before you screed the back corner is still an expensive lesson. Plan movement paths, define who screeds and who bull-floats, and stage tools where you will not walk through wet concrete.
Plan before you dig
Layout and elevation
Establish two references before excavation:
- Horizontal control: Square the slab with 3-4-5 triangle checks on the diagonals. For a rectangle, both diagonals must match within about 1/4 inch for a residential pad.
- Vertical control: Set form height so finished concrete drains away from the house. A common target is 1/4 inch per foot slope (about 2 percent), though local codes may specify minimum fall for impervious surfaces.
Call 811 or your regional utility locate service before digging. A 4-inch slab is shallow, but perimeter forms often go deeper for thickened edges.
For a backyard slab far from the driveway, a concrete pump may save hours of wheelbarrow work.
Thickness and edge details
Most small slabs are 4 inches uniform thickness on crushed stone. A thickened edge (monolithic footing strip) is worth considering when:
- The slab abuts soft landscape soil with no retaining structure
- You are pouring against frost-heave-prone ground in cold climates
- Local code requires a turned-down edge for frost depth
Thickened edges add volume fast. Account for them in your takeoff—do not run a simple area × thickness formula alone.
How much concrete do you need?
Volume in cubic yards follows the standard flatwork formula:
yd³ = length (ft) × width (ft) × thickness (in) ÷ 324
At 4 inches thick, a handy check is square feet ÷ 81 ≈ cubic yards (because 324 ÷ 4 = 81). Always add a waste margin—5 to 10 percent for flatwork with forms and a pump line is typical—then round up to your supplier’s batch increment (often 1/4 or 1/2 yard).
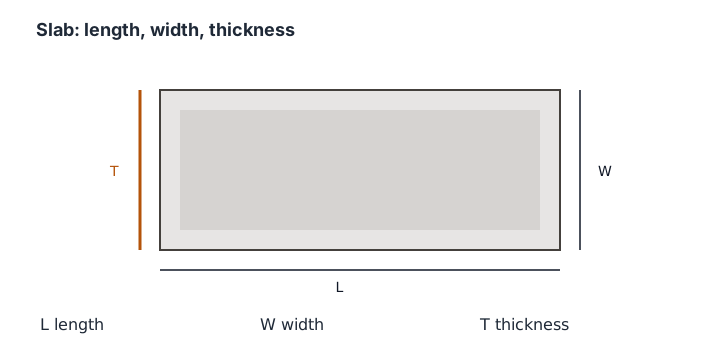
Run your exact dimensions through the concrete slab calculator to catch thickened edges, staggered steps, and bag equivalents. If the project also includes a separate walkway stripe or stair pad, combine shapes in the concrete calculator so one order covers the pour day.
| Slab size (4 in thick) | Net cubic yards | With 10% waste |
|---|---|---|
| 8 × 10 ft | 0.99 yd³ | 1.09 yd³ |
| 10 × 12 ft | 1.48 yd³ | 1.63 yd³ |
| 12 × 16 ft | 2.37 yd³ | 2.61 yd³ |
| 12 × 20 ft | 2.96 yd³ | 3.26 yd³ |
Values are net geometric volume; your plant may round to the next 1/4 yard. Confirm minimum load rules before you assume a 1-yard delivery.
Tools and materials checklist
Missing one tool mid-pour costs time you do not have. Stage these the day before:
- Forming: Straight 2×4 or 2×6 lumber, steel or composite form stakes, duplex nails, form release (or light vegetable oil on smooth lumber)
- Base: Crushed stone (often 3/4-inch minus), plate compactor or hand tamper, garden rake
- Placement: Wheelbarrows, shovels, rake, come-along winch (optional but valuable), rubber boots
- Strike and finish: Screed board (or vibratory screed), bull float, magnesium or wood hand float, edging tool, jointing tool or early-entry saw
- Cure: Curing compound sprayer, or 4-mil plastic and weights, or burlap and sprinkler
- Safety: Gloves, eye protection, knee pads; respirator if cutting cured concrete indoors
Site prep and gravel base
Concrete is only as stable as what it sits on. PCA and ACI guidance for slabs on grade both stress a uniform, well-drained support layer.
- Excavate to depth: Remove organic topsoil and soft fill. Your finish elevation minus slab thickness minus base thickness sets the dig depth.
- Install base: Place 4 to 6 inches of compactible aggregate (crushed stone, not rounded pea gravel). Rake flat.
- Compact in lifts: Compact thin lifts until the surface does not move under a hand tamper or until the plate compactor “rings” solid.
- Proof grade: Pull a string line or use a laser level. Low spots under a small slab become visible as ponding water before you pour—fix them now.
For depth, stone type and tonnage, see our guide to gravel under a concrete slab.
Do not pour on mud, frozen ground, or loose fill. If you must pour in cool weather, see our cold-weather pouring guide for ground heating and blankets.
Building forms that stay true
Forms are your finished edge. Bowed lumber telegraphs into the slab.
- Stake on the outside every 2 to 3 feet on straight runs, closer on curves.
- Align the top of the form to your finish elevation; the screed rides this plane.
- Oil or release agent keeps concrete from bonding to wood so forms strip cleanly.
- Brace corners so the pour pressure does not push forms outward—concrete exerts surprising lateral load while fluid.
For a small slab tied to an existing driveway or foundation, use an isolation joint (fiberboard or premolded joint filler) where new concrete meets old, unless your engineer details a doweled tie.
Reinforcement, fiber, and vapor barrier
Steel belongs in the upper half of the slab, on chairs—not resting on the gravel. For a 4-inch patio, welded wire mesh sheets or a #3 bar grid at 16 to 18 inches on center is typical residential practice.
A vapor retarder (10-mil polyethylene) under the slab is optional for exterior patios but common under conditioned spaces and some heated slabs. If you use one, punctures are inevitable—overlap seams and tape them; avoid standing water trapped between plastic and concrete by maintaining drainage in the base.
Synthetic microfiber mixed at the plant reduces plastic-shrinkage cracking while the surface is still wet. It does not replace steel for load carrying. Many homeowners specify both fiber and light mesh for small pads.
What mix to order
Tell the ready-mix plant it is an exterior slab on grade. In freeze-thaw climates, order air-entrained concrete with about 5 to 7 percent air and compressive strength appropriate to exposure—often 3,500 to 4,000 psi at 28 days for patios that see winter moisture. Mild-climate walkways may use 3,000 psi when codes allow.
Also specify:
- Slump: Often 4 to 5 inches for flatwork placed directly from the chute; lower if you need stiffer concrete on a slope.
- Maximum aggregate size: 3/4-inch is typical; confirm chute clearance if forms are tight.
- Placement time: Hot weather may require retarding admixtures; cold weather may need heated water or accelerating admixtures per ACI 306.
Match strength to use: if this “small” pad is actually a driveway tire path, read what PSI concrete for a driveway before you order.
Pour day: place, screed, float, finish
1. Pre-pour inspection
Forms tight? Base damp but not muddy? Steel chaired? Tools staged downhill of the pour path? Truck can reach the form without driving on soft lawn?
2. Placement
Discharge concrete as close to final grade as possible—do not rake wet mud long distances. That segregates paste from aggregate and weakens the surface. Shovel into corners, then pull back with a rake.
3. Screeding
Saw the screed board back and forth along the form tops (or wet screed rails) while a helper adds concrete ahead of you. Fill low spots; strike off highs. On very small pours, a straight 2×4 works; on wider slabs, an aluminum screed or vibratory screed saves shoulders.
4. Bull floating
As soon as the bleed water sheen is manageable, run the bull float perpendicular to your screed direction, lifting the leading edge on the return pass. This embeds aggregate slightly and levels minor humps.
5. Edging and hand floating
Edge before the concrete is too hard—usually once the surface supports your weight on knee boards with only a slight imprint. Magnesium floats open the surface for broom or trowel finishes without sealing it prematurely.
6. Final finish
The last finishing step on most outdoor pads is how to broom finish a slab so the surface is not slick.
Exterior slabs almost always get a broom finish for traction. Drag a damp broom across when the paste is stiff enough to leave uniform ridges. Avoid over-troweling exterior concrete; a closed, slick finish can be slippery and may scale under freeze-thaw.
Control joints and edges
If the pad meets the house or a post, install a full-depth expansion joint so the new concrete is not tight to the structure.
Concrete shrinks as it cures. Joints create weak planes so shrinkage cracks where you plan, not across the middle of the patio. See what to do about hairline cracks in concrete later.
- Spacing: Roughly 8 to 12 times slab thickness in feet (4-inch slab → 8 to 10 feet between joints).
- Depth: Saw cuts or tooled joints at one-quarter of slab depth.
- Layout: L-shaped patios need joints aligned with re-entrant corners—those inside corners concentrate stress.
Round or bevel exposed edges with an edging tool while the concrete is still plastic. That prevents chipping when forms are stripped.
Curing: the step most DIY pours skip
Strength gain requires moisture and time. ACI 308R emphasizes keeping the surface continuously moist or sealed during the early days.
Pick one method and start within a few hours of finishing:
If frost is forecast, cover the fresh slab with a curing blanket.
- Membrane-forming curing compound sprayed at manufacturer coverage rates
- Plastic sheeting laid flat with sealed seams (avoid wrinkles that telegraph discoloration)
- Wet burlap kept saturated for at least 3 to 7 days in hot, windy weather
Do not begin curing while bleed water is still sitting on the surface—either lightly remove bleed water without rodding the paste, or wait until it evaporates, per your finisher’s judgment.
For outdoor slabs, sealing after the cure adds winter protection.
Wait before drilling for anchors; here is how long.
Traffic timing: light foot traffic often waits 24 to 48 hours; wheeled loads longer. Our drive-on timeline applies when the small slab is part of a driveway path.
Worked example: 10 × 12 ft patio pad
Volume, order, and materials
- Area: 10 × 12 = 120 sq ft.
- Thickness: 4 in → yd³ = 120 × 4 ÷ 324 = 1.48 yd³ net.
- Waste 10%: 1.48 × 1.10 = 1.63 yd³ → round to 1.75 yd³ if the plant batches in 1/4-yard steps.
- Base: 120 sq ft × 4 in compacted stone ≈ 1.48 yd³ loose placed (compacts to less—order by truck or bulk bag policy locally).
- Wire mesh: one 5 × 10 ft sheet plus overlap, or compute grid in the slab calculator.
Schedule the truck for morning before afternoon wind picks up. Two people can screed 120 square feet; a third person on the phone with the driver is worth it.
Mistakes that crack small slabs
- Ordering by guess: Running short mid-pour produces cold joints and weak stripes. Calculate twice.
- Dry gravel that steals water: Mist compacted base lightly before placing concrete on hot days.
- Steel on the ground: Mesh stepped into the dirt provides zero tensile help.
- Finishing bleed water into the surface: That creates a weak, dusty skin that scales.
- No joints on a 12-foot continuous pour: Random shrinkage cracks will find the visual center of your patio.
- Stripping forms too early: Wait until edges are hard enough not to chip—often 12 to 24 hours.
When your numbers are set, pour with confidence: compact base, true forms, correct yards, disciplined finish, and real curing. That is how small slabs last decades instead of seasons.
Pouring something longer and narrower? See how to pour a concrete walkway.
Building a landing with stairs? See our guide to concrete step forms and pouring.
A small landing slab sometimes meets a set of precast steps at the door.
After it cures, consider painting your new slab.
Not pouring new? Here is how to level an existing floor.
Tempted to spread the mix dry and hose it down? See why dry pour concrete is a bad idea for slabs.
Frequently asked questions
How thick should a small concrete slab be?
Most residential patios, shed pads, and walkway landings are 4 inches thick on a compacted gravel base. If the slab will see occasional vehicle tires (RV pad, driveway section), 5 to 6 inches with tied steel is common. Stepping stones and light equipment pads can be 3.5 inches when the base is excellent, but 4 inches is the safer default.
Do I need rebar in a small patio slab?
Model residential codes do not always require steel in basic slabs on grade, but reinforcement still helps control random cracking when the subgrade settles or the slab dries unevenly. Light welded wire mesh or a #3 bar grid on chairs is typical for patios. Driveways and heavy loads call for #4 bar—see our rebar vs wire mesh guide for takeoff spacing.
Can I pour a small slab with bagged concrete instead of a truck?
Yes for very small pours. Once net volume passes roughly 1 cubic yard, ready-mix delivery is usually faster and more uniform than mixing dozens of bags by hand. Use the slab calculator to compare bag count against truck volume before you decide.
How long before I can walk on a new small slab?
You can often walk on finished concrete after 24 to 48 hours if the surface is hard enough that edging tools did not gouge it. Keep wheeled loads off for about a week and follow your mix supplier’s guidance for heavier traffic.
When should I cut control joints in a small slab?
Saw-cut joints when the concrete is hard enough that the blade does not ravel the surface—often the same day as the pour in warm weather, or the next morning in cool weather. Cut to about one-quarter of the slab depth, spacing joints at roughly 8 to 12 times the slab thickness in feet (for a 4-inch slab, every 8 to 10 feet).
Do I need a permit for a small concrete patio?
It depends on your municipality. Many towns exempt low decks and small slabs at grade, but setbacks, impervious-surface limits, and inspections still apply in some areas. Call your building department with dimensions and location before you form.
- American Concrete Institute (ACI) 302.1R Guide to Concrete Floor and Slab Construction
- American Concrete Institute (ACI) 308R Guide to External Curing of Concrete
- Portland Cement Association (PCA), Design and Control of Concrete Mixtures
- International Residential Code (IRC) Chapter R506 — Concrete Floors (On Ground)
- NRMCA Publication 2PFFCM, Finishing Flatwork (National Ready Mixed Concrete Association)