- Coating types compared
- Epoxy: the classic garage floor
- Polyaspartic: faster but trickier
- Sealers and paint: simple and cheap
- Step 1: Test for moisture
- Step 2: Check the age and condition
- Step 3: Clean and degrease
- Step 4: Profile the surface
- Step 5: Plan the application
- Tools and supplies checklist
- Step 6: Apply the coating
- Cure times and when to drive on it
- Anti-slip and safety
- Cost overview
- Maintenance
- Common mistakes
- When to call a professional
- Frequently asked questions
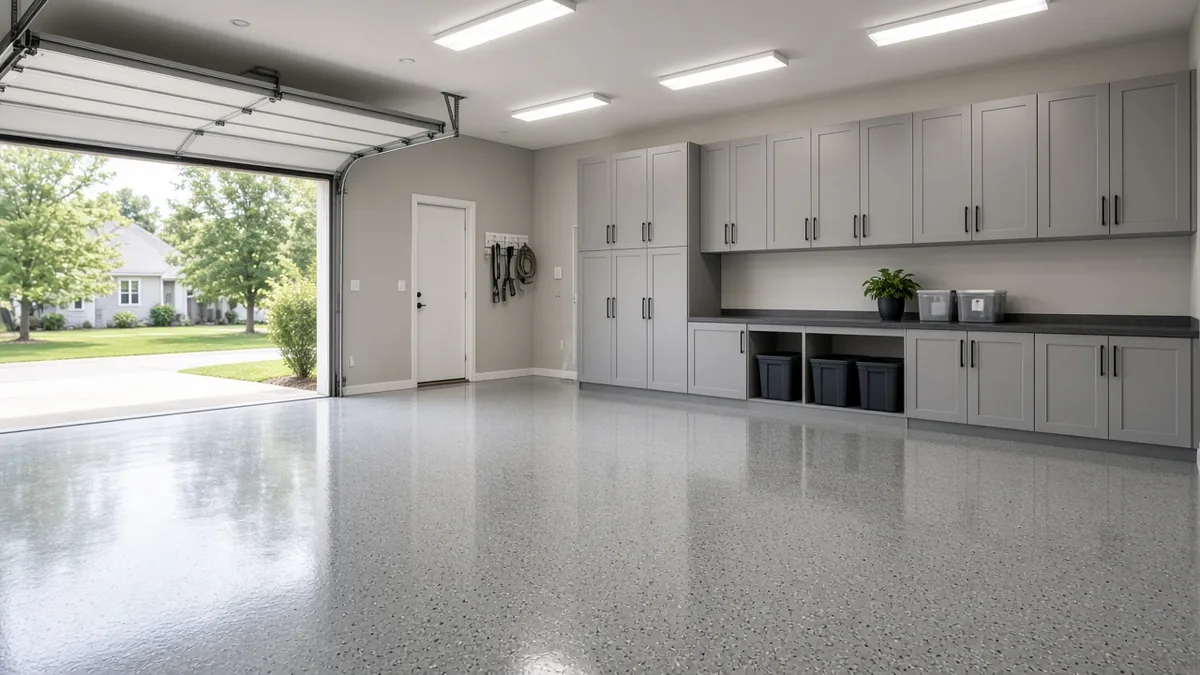
A concrete floor coating protects a garage or basement slab from stains, dust and wear, and makes it easier to clean. The main DIY choices are epoxy, polyaspartic, acrylic sealer and concrete floor paint. Epoxy gives a thick, hard finish at a moderate price; polyaspartic cures faster and resists sunlight better but costs more and is harder to apply; sealers and paint are the simplest but wear sooner. Whatever you pick, the result depends mostly on two things: a dry slab and good surface prep.
This is a practical DIY guide, not a professional specification. Products differ, so always follow the manufacturer's label for temperature, mixing, coverage, ventilation and cure times. For an outdoor patio, see our guide to painting a concrete patio instead.
Coating types compared
| Coating | Finish | DIY difficulty | Cure speed | Best for |
|---|---|---|---|---|
| Acrylic sealer | thin, clear or tinted | easy | fast | basements, light traffic, dust-proofing |
| Concrete floor paint | thin, solid colour | easy | moderate | quick refresh, low budget |
| Epoxy (two-part) | thick, hard, glossy | moderate | slow (days) | garages, workshops |
| Polyaspartic | thick, hard, UV-stable | harder (short working time) | fast (hours) | garages with sun exposure, fast turnaround |
Many garage systems combine products: an epoxy base coat, decorative flakes, then a clear polyaspartic or polyurethane topcoat. For a translucent, marbled look, read our guide to acid stain concrete.
Epoxy: the classic garage floor
Epoxy is a two-part coating: resin and hardener are mixed just before use and cure by chemical reaction. That means:
- it builds a thicker, harder film than paint,
- it resists oil, many chemicals and abrasion when applied correctly,
- it has a limited pot life once mixed, so you work in batches,
- it can yellow in direct sunlight unless topcoated with a UV-stable product.
Kits for home use often include a cleaner or etcher, the two-part epoxy and decorative flakes.
Polyaspartic: faster but trickier
Polyaspartic coatings (part of the polyurea family) cure much faster than epoxy, sometimes allowing a floor to be finished in a day. They are generally more UV-stable, so they suit garages that get sun through an open door. The trade-off is a short working time, which makes them less forgiving for first-time DIYers, and a higher price.
Sealers and paint: simple and cheap
An acrylic sealer soaks in and forms a thin film. It reduces dust and stains and is easy to reapply. Concrete floor paint adds colour and some protection but wears faster under car tyres, especially "hot tyre pickup", where warm tyres lift the coating. For a basement or a low-traffic floor, either can be a sensible choice.
Indoor concrete counters need a food-safe finish; see our notes on sealing concrete countertops.
Step 1: Test for moisture
Moisture coming up through the slab is the main reason coatings peel. Before you buy anything, do the plastic-sheet test, based on ASTM D4263:
- Tape a square of clear plastic sheet, about 18 by 18 inches, flat to the floor on all four edges.
- Leave it for 16 to 24 hours.
- Lift it. If there is condensation under the plastic or the concrete looks darker, moisture is coming through.
Repeat in a few places, especially near walls and low spots. If moisture shows up, look for a product rated for damp slabs or get advice before coating. Do not coat over a wet slab.
Step 2: Check the age and condition
- New concrete usually needs to cure for about 28 days before coating; check the label.
- Old coatings, sealers or paint must be removed or tested for adhesion. Coatings rarely bond to a sealed surface.
- Cracks and holes should be repaired first. See how to fix cracks in concrete.
- Uneven floors can be levelled first with self-leveling concrete, then coated once cured.
A simple water drop test tells you if the slab is sealed: sprinkle water on the floor. If it darkens and soaks in within a few minutes, the surface is open enough to coat. If it beads, there is probably a sealer or coating to remove.
Step 3: Clean and degrease
Oil, grease and tyre marks stop coatings from bonding. Degrease first: here is how to remove oil stains from concrete.
- Sweep and vacuum the whole floor.
- Scrub oil stains with a concrete degreaser and a stiff brush.
- Rinse thoroughly and let the floor dry fully.
Step 4: Profile the surface
Coatings need a slightly rough surface to grip, similar to medium sandpaper.
- Acid or citric etching is common in DIY kits. Follow the instructions, rinse well and let the slab dry.
- Mechanical grinding with a rented diamond grinder gives the best profile and is often recommended for epoxy and polyaspartic. Use dust extraction and wear hearing, eye and breathing protection.
After profiling, vacuum all dust. Any dust left behind weakens the bond.
Step 5: Plan the application
Read the whole label before you open anything. Check:
- Temperature range for the air and the slab, and avoid days when the slab is near the dew point.
- Coverage per kit, so you buy enough for your square footage.
- Pot life and how much to mix at once.
- Ventilation and personal protective equipment, such as gloves, eye protection and a respirator if the label requires one.
- Recoat and cure times before foot traffic and before driving on it.
Measure the floor and use our concrete slab calculator area figure to check how many kits you need.
Tools and supplies checklist
Gather everything before you start, because epoxy will not wait while you go to the store:
- stiff broom, shop vacuum and degreaser,
- etching solution or a rented diamond grinder,
- crack filler and a putty knife,
- painter's tape and a brush for edges,
- a roller frame, extension pole and the roller covers the label recommends,
- mixing bucket, drill and mixing paddle,
- spiked shoes if you will broadcast flakes,
- gloves, eye protection and any respirator the label calls for.
Step 6: Apply the coating
A typical DIY epoxy sequence looks like this:
- Tape edges and cut in around the walls with a brush.
- Mix only as much as you can apply within the pot life.
- Roll in sections, working away from the exit so you do not trap yourself.
- Broadcast flakes, if using them, while the coat is wet.
- Let it cure to the label's recoat time.
- Apply a clear topcoat if your system includes one.
Keep a wet edge and do not stop halfway across the floor. Pets, children and vehicles should stay out until the label says it is safe.
Cure times and when to drive on it
Cure times vary by product and temperature. Many epoxies allow foot traffic after about a day and vehicle traffic after several days; polyaspartic products are often faster. The label is the only reliable guide. Cool weather slows curing, so allow extra time.
Anti-slip and safety
Glossy coatings can be slippery when wet. Many systems offer an anti-slip additive or textured flakes; consider them near doors, steps and where cars bring in rain or snow. Keep the room ventilated during and after application and store leftover products as the label directs.
Cost overview
Costs vary widely by product, floor size and region. As a rough guide:
- sealers and floor paint are the lowest-cost options,
- DIY epoxy kits cost more but cover a single- or two-car garage,
- polyaspartic systems and professional installation cost the most.
Get prices for your floor size from local stores or installers. Remember to budget for prep: degreaser, etcher or grinder rental, crack filler, tape and rollers.
Maintenance
- Sweep or dust-mop regularly; grit wears coatings like sandpaper.
- Clean spills quickly, especially oil and chemicals.
- Use mats under car tyres in winter if road salt is used. See is salt bad for concrete?
- Touch up worn areas with the same product before they spread.
Common mistakes
| Mistake | What happens | How to avoid it |
|---|---|---|
| Coating a damp slab | peeling, bubbles | do the plastic-sheet test |
| Skipping etching or grinding | poor adhesion | profile the surface |
| Leaving dust | weak bond | vacuum thoroughly |
| Mixing too much epoxy | it hardens in the bucket | mix in small batches |
| Driving on it too soon | tyre marks, lifting | follow the label cure time |
| Coating in the cold | slow or poor cure | check the temperature range |
When to call a professional
Consider a professional installer if the moisture test fails, the slab has large or moving cracks, you want a polyaspartic system with a short working time, or you would rather not grind the floor yourself. A pro can also advise on products for damp basements.
Frequently asked questions
What is the best concrete floor coating for a garage?
For most DIYers, a two-part epoxy kit is a good balance of durability and price. Polyaspartic coatings cure faster and resist sunlight better but are harder to apply and cost more.
How do I know if my concrete is too damp to coat?
Tape a square of clear plastic to the floor for 16 to 24 hours. If you see condensation or the concrete underneath looks darker, moisture is coming through and you should not coat yet.
Do I need to grind concrete before epoxy?
The surface needs a slight profile for the coating to grip. Many DIY kits use etching, but grinding usually gives a more reliable bond. Follow the product's prep instructions.
Can I put epoxy on new concrete?
Wait until the concrete has cured, usually about 28 days, and check the label. Then test for moisture before coating.
How long before I can drive on a coated garage floor?
It depends on the product and temperature. Many epoxies need several days before vehicle traffic; polyaspartic products are often faster. Always follow the label.
Is a sealer the same as a coating?
No. A sealer is a thin, penetrating or film-forming layer mainly for dust and stain resistance. A coating such as epoxy builds a thicker, harder surface.