- When to patch concrete steps (and when not to)
- Choose the right repair material
- Tools and materials
- Step 1: Prep the damaged concrete
- Step 2: Rebuild chips and nosings
- Step 3: Fill cracks on treads and risers
- Step 4: Resurface worn treads
- Step 5: Cure the patch before you use the steps
- Common mistakes
- Frequently asked questions
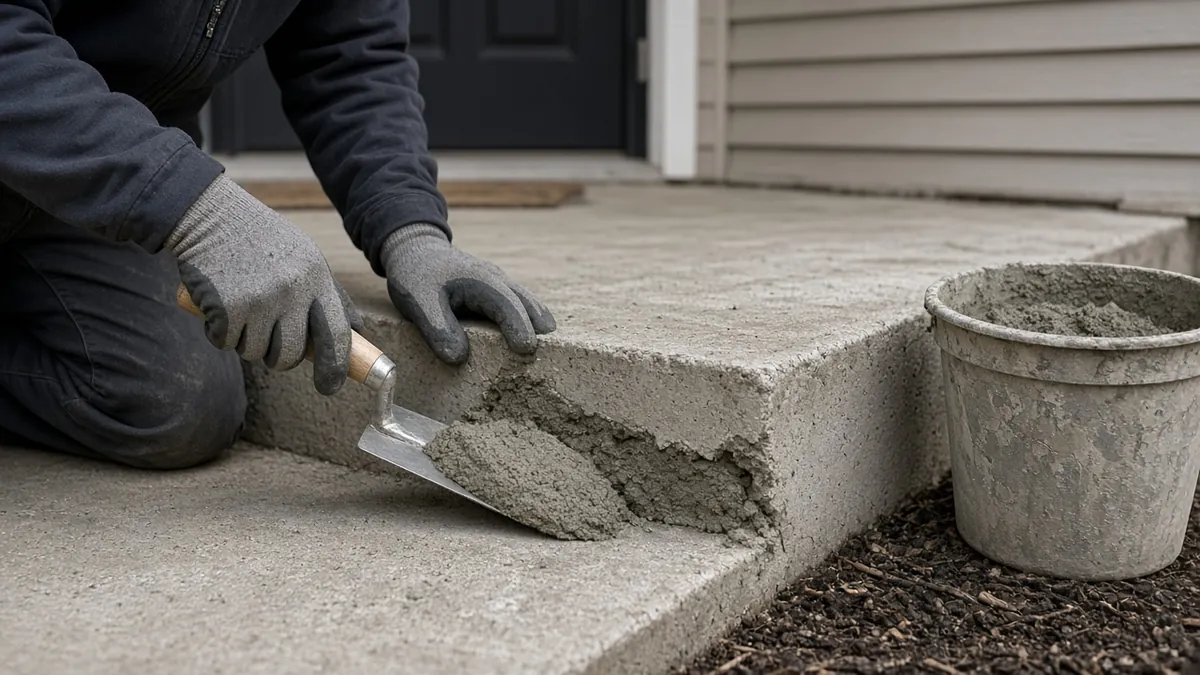
Patching concrete steps is the job of repairing damage on an existing flight: a broken front edge, a worn tread, a corner chip or a small crack. It is not the same as pouring a new staircase and not the same as filling a random driveway crack. Steps take concentrated foot traffic on thin edges, so the repair has to stick, stay level and give you grip underfoot.
This guide covers when a patch is enough, how to prep the surface, how to rebuild a nosing and when to stop and replace the flight instead. If the steps are beyond repair and you plan to pour new ones, use our guide on how to pour concrete steps. For volume math on a replacement pour, use the concrete step calculator.
When to patch concrete steps (and when not to)
A patch works when the steps are still solid underneath. Good candidates include:
- Small to medium chips on a tread or riser
- A crumbled nosing (the front edge of a step) where the rest of the tread is sound
- Surface scaling or a rough, sandy top layer
- Hairline or narrow cracks that do not move when you walk
Replacement, or a professional structural repair, is the safer path when:
- A step sounds hollow or moves underfoot
- A crack runs through the full depth and is getting wider
- The flight has settled so the risers are no longer even
- Whole treads are crumbling or you can see rusted steel with lost concrete around it
- The steps lean away from the house or have pulled apart at the landing
Uneven risers are a trip hazard. Many U.S. areas follow the International Residential Code, which limits home stair risers to 7 3/4 inches and requires treads at least 10 inches deep. A patch should restore the original uniform height and depth, not change them.
If the flight cannot be saved, you can pour a new one or look at precast concrete steps.
General slab cracks are covered in how to fix cracks in concrete. Use that page for driveways and sidewalks; the steps below stay focused on treads, risers and nosings.
Choose the right repair material
Match the product to the thickness of the repair. Using a thin overlay mix in a deep hole, or a coarse mix in a paper-thin feather edge, is why many step patches fail after the first winter.
| Problem | Better product type | Typical thickness |
|---|---|---|
| Deep chip or broken nosing | Vinyl concrete patcher or a polymer-modified repair mortar | Often 1/4 inch up to a couple of inches; read the bag |
| Worn, sandy tread | Concrete resurfacer or overlay | A thin coat, often about 1/16 to 1/2 inch |
| Narrow crack | Concrete crack filler or a vinyl patcher worked into a widened joint | Depends on the product |
| Smooth, nonporous old concrete | Repair mix plus a bonding adhesive or slurry | As directed |
Quikrete and similar manufacturers sell vinyl concrete patchers made for vertical and overhead edges, which is what a step nosing is. A plain sand mix with extra water will slump off the edge and shrink. Follow the bag for water ratios and minimum thickness. If the product says it cannot be feathered to a knife edge, cut the repair area a bit deeper so the patch has something to hold.
For a whole worn flight that is still structurally sound, resurfacing the treads can look cleaner than dozens of small spots. That is closer to how to resurface concrete, but you must keep each tread sloped slightly forward so water does not pond.
Tools and materials
- Vinyl concrete patcher or polymer-modified repair mortar
- Concrete resurfacer, if you are recoating treads
- Concrete bonding adhesive (if the product calls for it)
- Hammer and cold chisel, or a small chipping hammer
- Wire brush, stiff broom and a shop vacuum
- Spray bottle or hose with a gentle nozzle
- Margin trowel, pointing trowel and a wood or magnesium float
- Edger with about a 1/2-inch radius, if you are rebuilding a nosing
- Straightedge or level
- Mixing bucket and a drill with a mixing paddle
- Plastic sheeting or a curing compound
- Safety glasses, gloves and a dust mask
If you are mixing a larger batch by hand, how to mix concrete in a wheelbarrow covers water ratios and timing. Repair mortars are usually mixed in a bucket in small batches because they stiffen faster than regular concrete.
Step 1: Prep the damaged concrete
Patches fail more often from poor prep than from the mix itself.
- Remove everything loose. Chip away cracked or crumbling concrete until you reach sound material. Undercut the edges slightly so the hole is a bit wider at the back than at the surface. A V-shaped crater that is thin at the rim will let the patch pop out.
- Square the nosing if it is broken. Cut back to a fairly straight line along the tread. A ragged feather edge is hard to keep intact.
- Clean the hole. Wire-brush dust, dirt and any old failed patch. Vacuum the crumbs. Oil or leftover deicer residue can stop a bond; if the steps are stained with oil, clean them first the way you would on a slab (see how to remove oil stains from concrete).
- Dampened, not flooded. Most cement repair products want a saturated surface-dry base: dark with water, with no puddles. A bone-dry hole sucks moisture out of the patch; a puddle weakens it.
If the manufacturer requires a bonding adhesive, brush it onto the damp concrete and place the patch while the adhesive is still tacky, exactly as the label says.
Step 2: Rebuild chips and nosings
The front edge of a step takes the most abuse from feet, snow shovels and delivery carts.
- Mix a stiff batch of vinyl patcher. It should hold a peak on the trowel without slumping.
- Press the mix firmly into the hole so it fills the undercut edges. Work from the back of the repair toward the nosing.
- Overfill slightly, then shape the tread so it matches the rest of the flight. Keep a slight forward pitch, about 1/4 inch per foot, so water runs off the front edge.
- Round the nosing with an edger once the mix starts to stiffen. A sharp square corner chips again quickly.
- Texture the surface to match the nearby concrete. A wood float or a light broom dragged side to side gives grip. A steel-troweled polish looks neat and turns slick when it rains.
Support a large nosing repair with a short scrap of board screwed or clamped to the riser as a temporary form. Oil the board or use a piece of plastic so it releases. Remove it once the patch holds its shape.
Step 3: Fill cracks on treads and risers
Not every crack needs the same treatment.
- Hairline surface cracks that do not move can take a thin vinyl patcher or a concrete crack filler after cleaning.
- Wider cracks should be opened slightly with a chisel into a narrow channel, cleaned, dampened and packed with patcher.
- Cracks that go through the step and move are a structural problem. Filling them will not stop the movement. Look at replacement or professional help before you hide the warning sign under a skin of gray mortar.
Keep the finished repair flush with the tread. A ridge becomes a trip edge; a dish collects water and ice.
Widespread flaking is spalling on concrete steps, which needs the loose skin removed before you patch.
Step 4: Resurface worn treads
If the whole walking surface is sandy or pitted but the step is solid, a thin resurfacer can restore a uniform, grippy top.
- Clean and dampen every tread.
- Mix the resurfacer to the pourable or spreadable consistency on the bag.
- Work a thin scratch coat into the pores with a broom or scrub brush, then apply the finish coat.
- Keep that slight forward slope.
- Broom the surface before it sets.
Do not bury the original nosing under a thick blob that changes the riser height. Thin, even coats keep the flight uniform.
Step 5: Cure the patch before you use the steps
Cement repairs need moisture and time. Follow the bag, and as a general habit:
- Cover the repair with plastic or apply a curing compound so it does not dry out in sun or wind.
- Keep foot traffic off a small patch for at least 24 hours, longer in cold weather.
- Keep heavy loads, dollies and furniture off the steps until the product reaches the strength the manufacturer lists.
Cold weather slows curing and frost can ruin a fresh repair. If overnight temperatures will drop near freezing, wait for a milder window or protect the work. Our guides to pouring concrete in cold weather and concrete curing blankets explain the same temperature problem for new concrete.
In winter climates, avoid salt on a fresh patch. Is salt bad for concrete covers safer deicers and first-season care.
If a loose railing helped crack the edge, see how to anchor a railing on concrete steps so it stays tight.
Common mistakes
- Patching over loose concrete. If it moves now, it will take the new material with it.
- A mix that is too wet. Soupy patcher shrinks, cracks and slumps off a nosing.
- No forward slope. Flat spots hold water and fail earlier.
- A polished finish on a tread. Smooth and pretty is slippery.
- Ignoring uneven risers. Building up one tread more than its neighbors creates a trip.
- Using the steps the same afternoon. Give the repair the cure time on the bag.
Frequently asked questions
How do you patch concrete steps?
Chip away loose concrete, clean and dampen the hole, then pack in a vinyl concrete patcher or polymer-modified repair mortar. Shape the tread so it stays even with the rest of the flight, round the nosing, add a non-slip texture and keep the patch moist while it cures.
What is the best product for patching concrete steps?
A vinyl concrete patcher or polymer-modified repair mortar is the usual choice for chips and broken edges because it holds on vertical nosings. A concrete resurfacer is better for thin, worn tread surfaces. Match the product to the thickness you need.
Can you patch the front edge of a concrete step?
Yes, if the rest of the step is sound. Cut back to solid concrete, use a stiff repair mix, and temporarily support the edge with a small form board if the missing piece is large. Round the finished nosing so it does not chip again.
How long before you can walk on patched concrete steps?
Many repair products allow light foot traffic after about 24 hours, but the exact time is on the bag and changes with temperature and thickness. Keep heavy loads off the repair longer than you keep feet off it.
When should you replace concrete steps instead of patching them?
Replace or call in a professional if a step moves, sounds hollow, has widening full-depth cracks, has settled into uneven risers or has lost so much concrete that a patch would be a thin shell over a weak core.
Will a concrete step patch last through winter?
A well-bonded patch on sound concrete can last for years, but poor prep, a wet mix or salt on a fresh repair will shorten its life. Cure it fully and use a concrete-safe deicer if you need one.