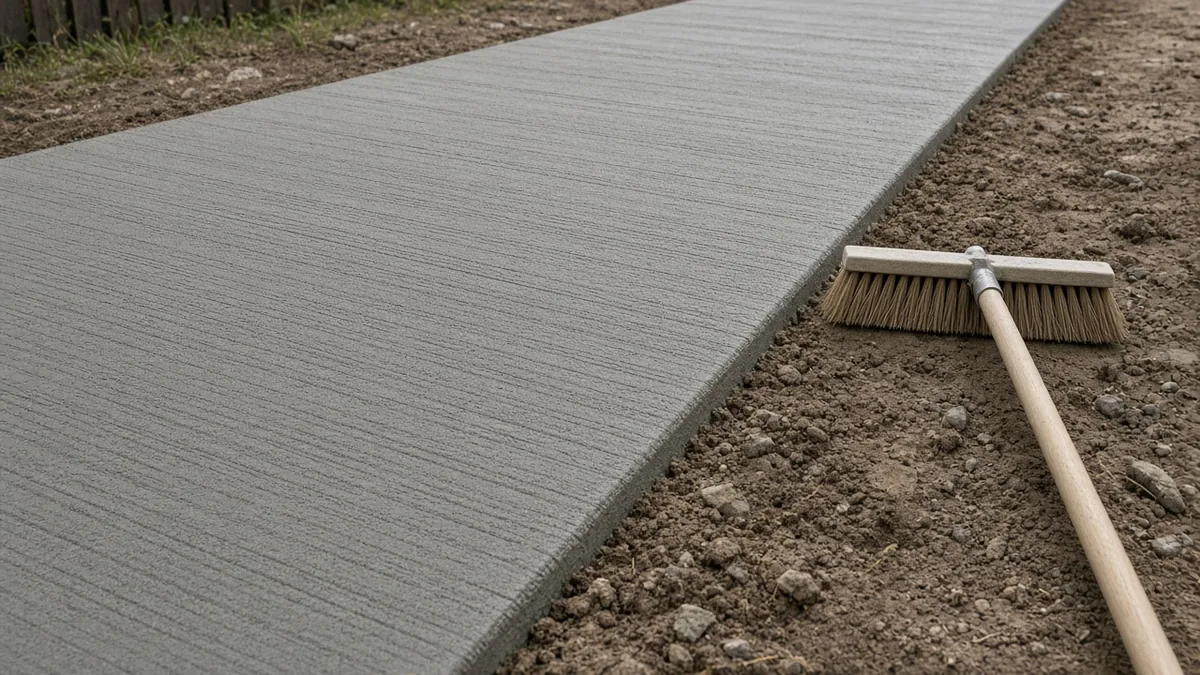
A broom finish is the most common texture on outdoor concrete. After the slab has been struck off, floated and had its bleed water leave the surface, you pull a concrete broom across the paste so it leaves shallow, even ridges. Those ridges give shoes and tires something to grip when the slab is wet, which is why driveways, walkways and many patios are broomed instead of left steel-troweled and slick.
This is a timing-and-technique job, not a decorative afterthought. Broom too early and you work water back into the surface. Broom too late and you tear the paste or leave bald patches. The steps below walk through the window, the pull, the direction of the lines and the mistakes that show up a year later. For the pour itself, start with how to pour a concrete walkway or how to pour a small concrete slab.
What a broom finish is for
A smooth trowel finish looks neat on an interior floor. Outside, that same smoothness can be slippery after rain or a light freeze. A broom finish trades a little visual uniformity for traction. The ridges should be even and shallow, not deep ruts that collect dirt and ice.
You will see broom finishes on driveways, sidewalks, patio slabs that need everyday footing, and exterior landings. It is not the only outdoor texture — exposed aggregate and stamped patterns have their place — but a broom is the default when you want everyday traction without a decorative overlay. It can hide small irregularities that a hard trowel would show. It will not hide poor grading or a wavy strike-off. Get the slab flat first; the broom only textures the skin.
When to broom: wait for the bleed water
Fresh concrete bleeds. Water rises to the surface while the heavier solids settle. That water looks like a glossy film. If you finish or broom while the film is still there, you can mix excess water into the top layer. The weak skin that results is sometimes called laitance, and it is a common reason a surface later dusts, scales or peels.
There is no universal clock. A slab in hot, dry wind may be ready in a short time. A cool, still morning or a cold-weather pour can take much longer. Watch the surface, not the clock.
Ready usually looks like this:
- The water sheen has left the surface
- A finger or a float leaves a slight imprint, but does not punch through or bring up soup
- A test pass with the broom leaves clean, even ridges and does not tear or drag lumps of paste
Too early:
- The broom swims or leaves watery slurry
- Ridges collapse behind the bristles
- Water puddles in the grooves
Too late:
- The broom chatters or skips
- Aggregate tears loose
- Parts of the slab will not take a mark at all
If only a section is ready — a sunny edge, for example — broom that area and come back to the slower spots. Do not force a single pass across a slab that is not uniformly ready.
Tools that leave a clean texture
Use a broom made for concrete finishing, not a household sweep broom. Concrete brooms have fairly stiff, even bristles and a bracket for a long handle so you can work from off the slab, or from kneeboards if you must be on it.
Use a fine or medium concrete broom for most patios and walks, and a stiffer one for a heavier driveway texture, plus a long handle, the float you already used to close the surface, an edger, a groover if you are putting joints in while the slab is plastic, and clean water to rinse the broom. Rinse before you start and whenever paste clumps in the bristles. A dirty broom leaves gouges in the finished skin.
The order is still the same no matter which float you used: strike off, close the surface, wait for bleed water to leave, edge and joint as planned, then broom.
How to pull the broom
Pull, do not push. Pulling keeps the bristles from digging in and hopping. Stand so you can draw the broom in a straight line across the slab, or along a planned path if the slab is wide.
- Set the broom at a slight angle, with even pressure across the head. The whole width of the head should touch.
- Pull toward you in one continuous motion. Do not stop mid-pass if you can help it.
- Overlap the previous pass by a small amount so you do not leave a bald strip or a heavy double ridge.
- Lift at the end of the pass rather than dragging the broom around the corner.
- Walk to the next starting point and repeat, keeping the lines parallel.
On a narrow walkway, you can often broom across the short direction in a few passes. On a wider small slab or driveway, work in lanes and keep the overlaps neat.
Pressure should be light to moderate. You want to groove the paste, not plow it. If one side of the head digs in, the texture will look heavier on that edge. Check the first two passes before you commit the whole slab.
If you must stand on the concrete, use kneeboards and come off as soon as you can. Footprints in a broom finish are hard to erase.
Which way the lines should run
On driveways and sidewalks, the usual practice is to run the grooves perpendicular to the direction of travel. A person walking or a tire rolling then crosses the ridges, which gives better footing than walking along the grooves.
On a patio, choose one direction and stay with it. Many finishers broom toward the low edge or the yard so the eye follows the drainage. What matters more than the theory is consistency. Mixed directions on one slab look accidental.
At edges, stop the broom short of a still-soft rounded edge if the bristles are going to collapse it. You can broom up to a tooled edge and leave a narrow, smooth border, which looks intentional and protects the corner. Do not drag paste into a joint or over a grooved control joint; keep those lines clean.
Fine, medium or heavy
Industry guides often group broom textures as fine, medium or heavy, depending on bristle stiffness, pressure and how plastic the surface is.
- Fine: shallow lines, comfortable underfoot. Common on patios and some walks.
- Medium: the everyday driveway and sidewalk look. Clear ridges, still easy to clean.
- Heavy: deeper grooves for steeper or wetter areas. Harder to keep clean and easier to overdo.
Match the texture to use, not to habit. A back-door landing that will be icy in winter can take a slightly heavier pass than a decorative patio. Deep grooves collect dirt, leaves and deicers, so do not confuse "more texture" with "better forever."
If you plan to paint a concrete patio later, a medium broom is usually easier to coat evenly than a very heavy one. If you plan only to seal a driveway, any of the three can work once the slab has cured.
After the broom: joints, curing and sealing
Texture does not finish the job. Control joints still need to be in the right places, at the right time. If you grooved joints in the plastic concrete, keep them clean of broomed paste. If you will saw-cut later, broom as usual and cut in the planned window so random shrinkage cracks do not beat the saw.
Curing still matters. A broomed surface has more area and can dry faster in wind or sun. Follow your curing plan — wet cover, curing compound or another method suited to the weather — and do not let the skin dry out in the first days. In cold weather, protect the slab from early freezing as well.
A sealer is optional but useful on many outdoor slabs once the concrete has cured and dried enough for the product you choose. Sealer will not hide a weak surface that was broomed through bleed water. It will help a sound broom finish shed water and resist staining.
Common mistakes
- Brooming while the surface is still glossy. This is the one that causes later scaling and dusting more than a slightly late pass does.
- Waiting until the paste has set. Then the broom tears, and patching a torn skin is harder than catching the window.
- Pushing the broom. Uneven, chatter-marked texture.
- A dirty or household broom. Clumps, streaks and stray bristles in the finish.
- Uneven pressure or changing direction halfway. The slab looks pieced together.
- Dragging paste into joints and edges. Rounded edges flatten; grooved joints clog.
- Walking the slab without boards. Footprints stay.
If a pass goes badly and the surface is still plastic, you can sometimes float the area lightly and broom again. If the paste has already stiffened, stop.
A short working order
- Pour, strike off and float as you would for any slab.
- Edge and place or plan the joints.
- Wait until bleed water and the water sheen are gone.
- Test a short broom pass in an inconspicuous lane.
- Pull the broom in straight, overlapping passes, usually across the line of travel.
- Keep the broom clean. Stay off the finished surface.
- Cure the slab, then seal later if the job calls for it.
That order holds for a short walkway, a patio and a driveway. The only things that change are the size of the lanes, the bristle stiffness and how closely you watch the weather. If a pour is new to you, practice the timing on a small slab before you texture a long walk or a set of steps.
For a more decorative textured surface, see our guide to exposed aggregate concrete.
Frequently asked questions
When do you broom finish concrete?
Broom after the bleed water has left the surface and the sheen is gone, but while the paste is still plastic enough to take a groove. There is no single wait time. Heat, wind, sun and the mix all change the window. If the broom tears or lifts aggregate, you are too late; if it swims in water or leaves slurry, you are too early.
Do you push or pull a concrete broom?
Pull the broom toward you. Pushing tends to chatter, skip and leave an uneven texture. Overlap each pass slightly and keep the pressure steady so the ridges stay even.
Which way should the broom lines run?
On walkways and driveways, the grooves usually run perpendicular to the direction of traffic so shoes and tires get more traction. On a patio, pick one consistent direction and stay with it, often draining toward the low edge.
Can I use a household broom?
Use a concrete finishing broom with even, fairly stiff bristles and a long handle. A household broom sheds, bends and leaves an uneven scratch. Keep the concrete broom clean so old paste does not gouge the surface.
What happens if you broom too early?
Working a glossy, bleeding surface can mix water back into the top paste, weaken the skin and leave a dusty or scaling surface later. Wait until the water sheen is gone, then broom.
Does a broom finish still need to be cured and sealed?
Yes. Texture does not replace curing. Keep the slab moist by the method you planned, then consider a sealer after the slab has cured, especially on a driveway or patio that will see weather and deicers.