- Cinder block vs concrete block: same thing at the store
- Before you start: permits, height and purpose
- Tools and materials
- Step 1: Count your blocks
- Step 2: Dig and pour the footing
- Step 3: Dry-lay the first course
- Step 4: Mix mortar to the right consistency
- Step 5: Set the corner (lead) blocks
- Step 6: Run the string line and fill in
- Step 7: Stack the next courses in running bond
- Step 8: Reinforce and fill cores where needed
- Step 9: Tool the joints
- Step 10: Cap the wall and protect it
- Finishing ideas
- Common mistakes to avoid
- Frequently asked questions
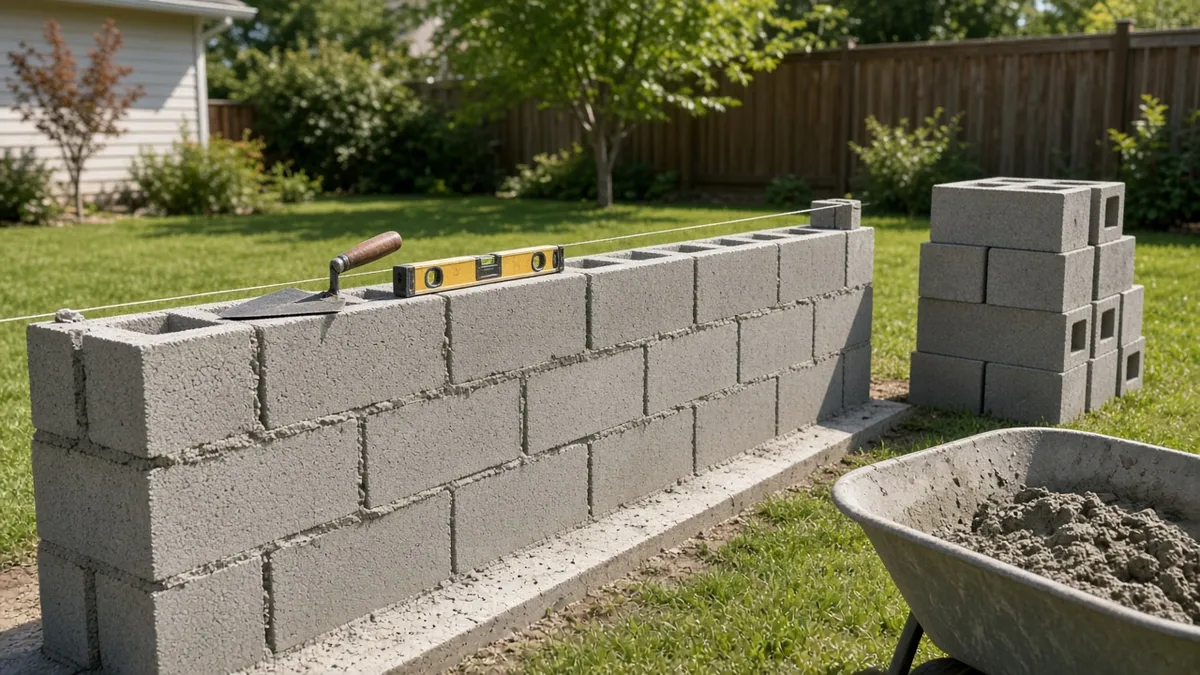
How to build a cinder block wall: pour a level concrete footing twice as wide as the block and below your frost line, set a 1-inch mortar bed, lay the two corner blocks first, run a string line between them, then fill in each course with 3/8-inch joints, staggering the blocks by half a length. Grout the cores with rebar where the wall needs strength, tool the joints when they are thumbprint hard and finish with cap blocks. A short garden wall is a realistic two-weekend DIY project; anything tall, retaining soil or holding up a structure needs a permit check and often an engineer.
This guide walks through the whole job for a typical freestanding garden or privacy wall made from standard 8x8x16 concrete blocks. Use our concrete block calculator for the count and the footing calculator for the concrete under it.
Cinder block vs concrete block: same thing at the store
True cinder blocks, made with coal cinder as the aggregate, are rarely made today. What the store sells as "cinder block" is a concrete masonry unit (CMU) made from cement, sand and gravel. The names are used interchangeably, so do not worry if the label says one and your plan says the other.
The standard unit is called 8x8x16, but those are nominal sizes. The actual block is 7-5/8 inches wide, 7-5/8 inches tall and 15-5/8 inches long. The missing 3/8 inch is the mortar joint, so each block plus its joint takes up exactly 8 by 16 inches of wall face. That is what makes block layout so tidy: wall lengths in multiples of 8 inches work out without cuts.
Before you start: permits, height and purpose
Check with your local building department before you buy anything. Rules vary, but many places require a permit for walls over a certain height, for any wall that retains soil, and for walls near property lines. A low freestanding garden wall is the friendliest DIY project. A retaining wall holding back a slope is a different design problem, with drainage, reinforcement and often engineering, and is beyond the scope of this guide.
Also call 811 before you dig the footing trench so buried utilities can be marked.
Tools and materials
- Standard 8x8x16 blocks, plus half blocks (8x8x8) for the ends, and cap blocks for the top.
- Bagged mortar mix (Type S or Type N are common for walls; follow the bag and local guidance).
- Concrete for the footing, plus No. 4 rebar if your design calls for it.
- Core fill grout if you will reinforce cores (grout is not the same as mortar).
- Brick trowel, pointing trowel, 4-foot level, line blocks or pins, mason's string, jointing tool, chalk line.
- Wheelbarrow or mixing tub, hoe, buckets, gloves and eye protection.
Step 1: Count your blocks
Measure the wall face: length times height in feet. Multiply the area by 1.125 blocks per square foot, because one 8x16 face covers 0.889 square feet. Add 5 to 10 percent for breakage and cuts.
| Wall size | Face area | Blocks (no waste) | With about 7% waste |
|---|---|---|---|
| 16 ft long x 2 ft high | 32 sq ft | 36 | 39 |
| 20 ft long x 3 ft high | 60 sq ft | 68 | 73 |
| 24 ft long x 4 ft high | 96 sq ft | 108 | 116 |
Subtract cap blocks if you will top the wall with solid caps instead of a last course of hollow block. The concrete block calculator handles all of this, including openings.
Step 2: Dig and pour the footing
Every block wall needs a continuous concrete footing. A common rule of thumb is a footing at least twice the width of the block, so an 8-inch block gets a 16-inch-wide footing, and it must sit below the local frost line so freeze-thaw cannot heave it. Thickness is often 8 inches for short garden walls. Your local code has the final word on size and depth.
Dig the trench, compact the bottom, set forms if the soil will not hold an edge, and place rebar on supports so it sits in the concrete, not on the dirt. If your design needs vertical bars tying the wall to the footing, set those dowels while the concrete is still wet, lined up with where the block cores will fall. Strike the top flat and level. Our guide to ordering ready-mix concrete helps on bigger footings; for small ones, mixing in a wheelbarrow works fine.
Let the footing cure before you lay block on it. Two days is a common minimum for a short wall; longer is better in cool weather.
Step 3: Dry-lay the first course
Snap chalk lines on the footing for both faces of the wall. Set the first course dry, without mortar, leaving a 3/8-inch gap between blocks (a scrap of 3/8 plywood is a handy spacer). This shows you whether the wall length works out to full and half blocks or whether you need to adjust. Mark the block positions on the footing, then pick the blocks back up.
Step 4: Mix mortar to the right consistency
Mix only what you can use in about an hour or two, following the bag. Good mortar is workable but stiff enough to hold the weight of a block. A quick test: load the trowel, snap it down to shake off excess, then tilt it to vertical. If the mortar hangs on, the consistency is right. If it slides off, it is too wet.
Step 5: Set the corner (lead) blocks
Dampen the footing, then lay a full 1-inch mortar bed where the first corner block will sit. Furrow it with the trowel tip so the mortar spreads evenly. Butter the end of the block, press it down into place and tap it until the bed joint is 3/8 inch and the block is level both ways. Do the same at the opposite end.
Experienced masons build up the corners, called leads, three or four courses high first, stepping each course back by half a block. Check leads constantly for level, plumb and height. Everything else in the wall follows them.
Step 6: Run the string line and fill in
Stretch a mason's line between the corners at the top edge of the course you are laying. Fill in the course between the leads, buttering one end of each block and pushing it against its neighbor. The top outer edge of each block should just kiss the line without pushing it. Scrape off squeezed-out mortar with the trowel as you go.
The last block in a course, the closure block, goes in last. Butter both ends of the closure block and both edges of the gap it is filling, then lower it straight down.
Step 7: Stack the next courses in running bond
For each new course, spread mortar on the face shells of the course below, set a half block at the end so joints stagger by half a block (running bond), raise the line and fill in. Keep checking with the level every few blocks. Small corrections are easy while mortar is soft; big ones mean pulling the block and starting that spot over.
Step 8: Reinforce and fill cores where needed
Walls that need extra strength get vertical rebar in the cores, tied to the footing dowels, with the cores filled with grout. Quikrete's guidance for load-bearing walls is rebar in every other core. Many garden walls also use horizontal joint reinforcement every couple of courses. Fill cores in lifts and rod the grout so it fills completely. Use the block fill numbers to estimate how many bags of grout you need.
Step 9: Tool the joints
When the mortar is "thumbprint hard" (firm enough that a thumb press leaves a print without sticking), run a jointing tool along the horizontal joints first, then the vertical ones. Concave joints shed water well and look neat. Brush off crumbs once the joints have stiffened. Tooling too early smears mortar; too late and it will not compact.
Step 10: Cap the wall and protect it
Set solid cap blocks on a mortar bed (or a masonry adhesive if the manufacturer allows it) to keep water out of the cores and give the wall a finished look. Cover fresh work if rain or frost is coming. Mortar, like concrete, cures best in mild weather; see our cold-weather pouring guide if you are building late in the season.
Finishing ideas
- Stucco or parge coat: a cement-based coat hides block texture and joints.
- Paint: use masonry paint after the wall has cured; our patio paint guide covers prep that applies here too.
- Veneer: thin stone or brick veneer turns a plain block wall into a feature wall.
- Planter walls: leave the top course open-cored and fill with soil for a low planter edge.
Common mistakes to avoid
- Skipping the footing or pouring it too shallow. Block on bare soil or a thin slab cracks.
- Not dry-laying the first course, then discovering a 3-inch gap at the end.
- Mortar that is too wet, which lets blocks sink and drift out of level.
- Laying without a string line, which makes a wavy wall.
- Building tall or retaining walls without design help. Height and soil load change everything.
Frequently asked questions
How many cinder blocks do I need for a wall?
Multiply the wall face area in square feet by 1.125, then add 5 to 10 percent for waste. A 20-foot wall 3 feet high has 60 square feet of face, so about 68 blocks before waste. Our concrete block calculator does the math for you.
Does a cinder block wall need a footing?
Yes. Every block wall needs a continuous concrete footing. A common rule is twice the block width (16 inches for 8-inch block) and below the frost line, but local code sets the final size and depth.
How high can I build a cinder block wall without rebar?
It depends on your local code, wind exposure and what the wall does. Short freestanding garden walls are sometimes built unreinforced, but taller walls and any wall that retains soil need reinforcement and often a permit and engineer. Check with your building department before you design.
What mortar should I use for a block wall?
Type S and Type N are the common choices for above-grade walls. Type S is stronger and often used for walls at or below grade; Type N is a general-purpose mix. Follow the bag directions and any local requirements.
How thick should the mortar joints be?
Aim for 3/8-inch bed and head joints, which is why a nominal 8x8x16 block is actually 7-5/8 by 7-5/8 by 15-5/8 inches. The first course sits on a thicker bed, about 1 inch, to take up small variations in the footing.
Can I build a cinder block wall in cold weather?
Mortar cures best between roughly 40°F and 70°F. Below that, you need cold-weather measures such as warmed materials, blankets and protection from frost, or simply wait for a milder stretch.