- Can you put pavers over concrete?
- Three ways to lay pavers on existing concrete
- Choosing pavers for an overlay
- Tools and materials
- Step 1: Clean and inspect the slab
- Step 2: Drill weep holes for drainage
- Step 3: Lay geotextile
- Step 4: Install edge restraints
- Step 5: Screed the bedding sand
- Step 6: Lay the pavers
- Step 7: Compact and fill the joints
- Caring for a paver overlay
- Common mistakes with paver overlays
- Frequently asked questions
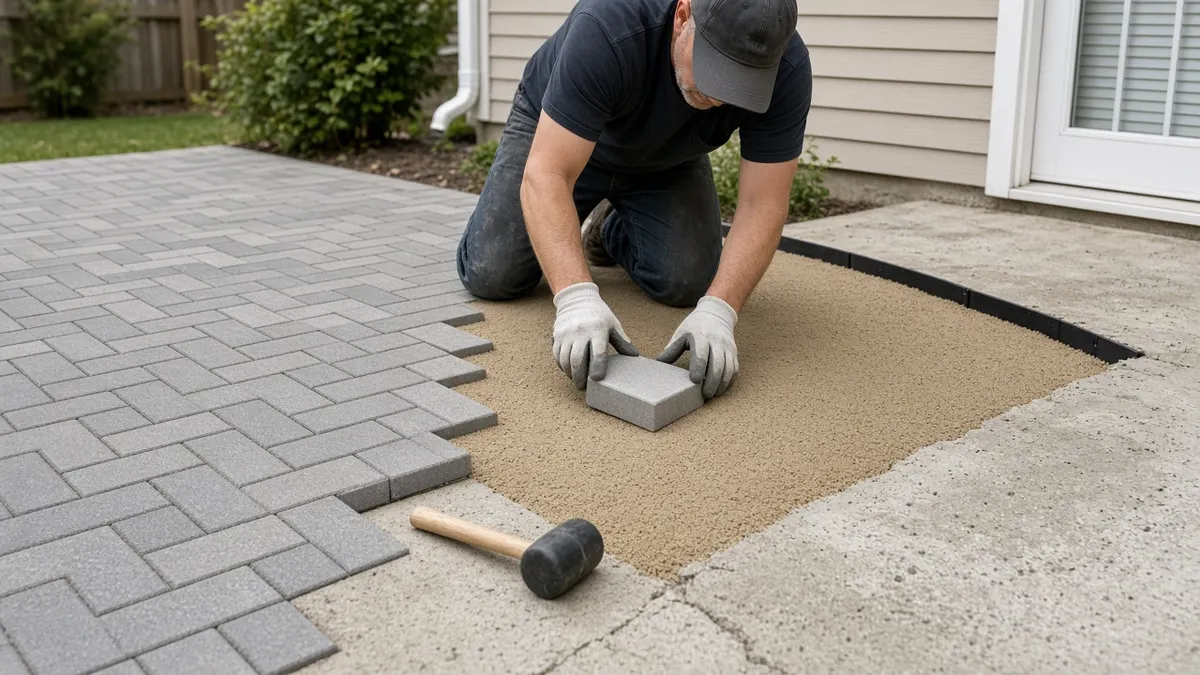
Pavers over concrete can turn a plain or stained patio into a patterned one without the cost and mess of breaking out the old slab. It works when the concrete is structurally sound, drains in the right direction and leaves enough height under doors for the added thickness. The usual method is a sand-set overlay: clean the slab, drill weep holes so water can escape, lay a thin bed of sand, set edge restraints and pavers, then compact and sweep sand into the joints.
This guide explains when an overlay makes sense, which method to choose and how to install it step by step. For costs and quantities of any concrete repair you do first, our concrete cost calculator gives a quick estimate.
Can you put pavers over concrete?
Yes, if the slab passes three checks.
- It is sound. Hairline cracks are fine. Wide, moving cracks, heaved sections or slabs that rock underfoot are not. A paver overlay follows the slab beneath it, so if the slab moves, the pavers will shift too. Repair stable cracks first with our guide on how to fix cracks in concrete. If a section has sunk, see concrete leveling before you start.
- It drains. The slab should slope away from the house. Water that collects under pavers has nowhere to go and will wash out sand or freeze in winter.
- There is room for the height. Pavers plus a sand bed add roughly 2 1/2 to 3 1/2 inches, depending on the paver thickness. Check the step down from each door, the height of any thresholds, and how the new surface will meet the lawn, steps or a garage floor.
If the slab fails the first test, an overlay is the wrong fix. You may be better off removing it and building a proper aggregate base, or resurfacing it instead (see our guide to how to resurface concrete).
Three ways to lay pavers on existing concrete
| Method | How it works | Best for | Watch out for |
|---|---|---|---|
| Sand-set | Thin bed of bedding sand on the slab, pavers on top, sand in the joints | Most DIY patios and walks | Needs weep holes and edge restraints so sand does not wash out |
| Bitumen-set | Pavers set in an asphalt-sand bed with a neoprene-asphalt adhesive | Commercial and heavy-use areas | Specialist work, not a typical DIY job |
| Mortar-set | Pavers bedded in mortar with mortared joints | Steps, edges and some porches | Rigid; slab cracks can telegraph through; drainage is harder |
For most homeowners the sand-set method is the practical choice. The steps below follow it, using the drainage and bedding details from the Interlocking Concrete Pavement Institute (ICPI), now part of the Concrete Masonry and Hardscapes Association.
Choosing pavers for an overlay
You can use standard pavers or thinner "overlay" pavers.
- Standard pavers (about 2 3/8 inches thick) are the thickness shown in the ICPI pedestrian overlay detail. They are sturdy and come in the widest range of shapes and colors.
- Thin pavers (often around 1 to 1 1/4 inches) are sold by some manufacturers specifically for overlays. They keep the added height down, which helps at door thresholds. Follow the manufacturer's installation guide, because some thin products are meant to be set in mortar or adhesive rather than sand.
Order about 5 to 10 percent extra to allow for cuts and breakage, more for diagonal or herringbone patterns.
Tools and materials
- Pavers and edge pavers (soldier course)
- Concrete bedding sand (coarse, washed)
- Polymeric or regular jointing sand
- Non-woven geotextile fabric
- Edge restraints (plastic or aluminum paver edging with spikes, or a mortared soldier course)
- Washed pea gravel for weep holes
- Pressure washer, hammer drill with a 2-inch core or masonry bit
- Two 1-inch screed rails (metal pipe or conduit) and a straight screed board
- Rubber mallet, string line, level, tape measure
- Wet saw or paver splitter for cuts
- Plate compactor with a rubber pad or protective mat
Step 1: Clean and inspect the slab
Pressure-wash the slab to remove dirt, moss and loose material. Look closely for wide cracks, high spots and low spots. ICPI guidance warns against using bedding sand to fill dips in the base; fix depressions in the concrete first so the sand bed stays an even thickness.
Step 2: Drill weep holes for drainage
This is the step people skip, and it is the one that matters most. Water will get through paver joints. On a concrete base it needs a way out.
ICPI Tech Spec 17 recommends 2-inch diameter weep holes around the perimeter on about 10-foot centers and at the low points of the slab. Fill each hole with washed pea gravel and cover it with geotextile so bedding sand cannot wash down into it. If the slab has a slope, put more holes along the low edge.
Step 3: Lay geotextile
Roll non-woven geotextile over the slab, especially over cracks and control joints, and turn it up at the edges where it meets walls or curbs. The ICPI overlay detail shows geotextile over the whole concrete base, turned up at the sides. It stops bedding sand from migrating into cracks and joints.
Step 4: Install edge restraints
Pavers on a slab need firm edges or they will creep outward. Options include:
- A soldier course mortared to the slab. Set a row of pavers around the perimeter on a bed of mortar. Once cured, it acts as a curb that holds the sand and field pavers.
- Paver edging fixed to the slab. Use edging designed for concrete bases, fixed with masonry anchors rather than ground spikes.
Keep the top of the edge course level with where the finished field pavers will sit after compaction.
Step 5: Screed the bedding sand
Lay two screed rails about 1 inch thick on the fabric, parallel to each other and a few feet apart. Pour bedding sand between them and pull a straight board across the rails to strike it flat. Remove the rails, fill the grooves with sand and smooth them with a trowel. The ICPI overlay detail shows a 1-inch sand bed. Do not walk on the screeded sand.
Step 6: Lay the pavers
- Start at a straight edge, such as the house wall or a squared edge course.
- Place each paver straight down onto the sand; do not slide it, which shoves sand into ridges.
- Keep joints consistent. ICPI recommends joint widths of 1/16 to 3/16 inch. Many pavers have spacer nubs that set this automatically.
- Check your lines with a string every few rows so the pattern stays straight.
- Cut edge pieces with a wet saw or splitter, and keep cut pieces at least about a third of a full paver where possible so they stay stable.
Step 7: Compact and fill the joints
Sweep dry jointing sand over the surface. Run a plate compactor fitted with a rubber pad or a protective mat across the pavers to settle them into the bedding sand, then sweep in more sand and compact again until the joints are full. If you use polymeric sand, follow the bag directions exactly for sweeping, blowing off the surface and wetting.
Caring for a paver overlay
A paver overlay needs a little attention in its first year and very little after that.
- Top up joint sand. Joints settle after the first few rains. Sweep in more jointing sand whenever you can see the sand line dropping below the paver chamfers.
- Keep weep holes clear. Check the low edge after heavy rain. If water sits on the surface or seeps out muddy, a weep hole may be clogged.
- Clean gently. Use a garden hose and a stiff brush for routine cleaning. If you pressure-wash, keep the wand at a low angle and well back from the joints so you do not blast out the sand.
- Seal if you want. A paver sealer can deepen color and help lock joint sand, but it is optional. If you seal, wait until efflorescence (white haze) has stopped appearing, which can take a few months on new pavers.
- Fix a sunken paver early. Lift it out with two flat screwdrivers, add a little bedding sand, reset it and tap it level with a rubber mallet.
Common mistakes with paver overlays
- No weep holes. Trapped water washes out sand, stains pavers and can freeze.
- Too much sand. A thick bed over concrete moves and ruts. Keep it close to 1 inch.
- Ignoring the door threshold. Measure before you buy. Thin pavers can save the day.
- Weak edges. Without a solid restraint, pavers spread and joints open.
- Covering a failing slab. An overlay cannot fix a slab that is heaving or breaking up.
Frequently asked questions
Can you lay pavers over concrete?
Yes, as long as the slab is structurally sound, slopes away from the house and leaves enough height at doors. A sand-set overlay with weep holes, geotextile, edge restraints and a thin sand bed is the most common DIY method.
How much sand do you need under pavers on concrete?
The ICPI overlay detail shows about 1 inch of bedding sand over geotextile on the concrete base. Keep the bed even and do not use extra sand to fill dips in the slab; repair those first.
Do pavers over concrete need drainage holes?
Yes. ICPI recommends 2 inch weep holes around the perimeter on about 10 foot centers and at low points, filled with washed pea gravel and covered with geotextile so water can escape without washing out sand.
How thick are pavers for an overlay?
Standard pavers are about 2 3/8 inches thick. Some manufacturers make thinner overlay pavers, often around 1 to 1 1/4 inches, to limit the added height. Follow that product's installation instructions.
Should you use mortar or sand to lay pavers on concrete?
Sand-setting is more forgiving and drains better, so it suits most patios. Mortar-setting is rigid and can show slab cracks through the pavers, but it is sometimes used on steps and edges. Edge courses are often mortared even when the field is sand-set.
Is it cheaper to put pavers over concrete than to remove it?
Often, because you skip demolition, hauling and a new aggregate base. The savings depend on the slab's condition, the paver type and local labor rates, so price both options before you decide.