- Self-leveling concrete at a glance
- How does self-leveling concrete work?
- Where to use self-leveling concrete
- How thick can self-leveling concrete be?
- How much self-leveling concrete do you need?
- Tools and materials checklist
- How to pour self-leveling concrete, step by step
- How long does self-leveling concrete take to dry?
- Common self-leveling mistakes
- Concrete floor leveling indoors
- Self-leveling concrete vs other fixes
- Safety
- Frequently asked questions
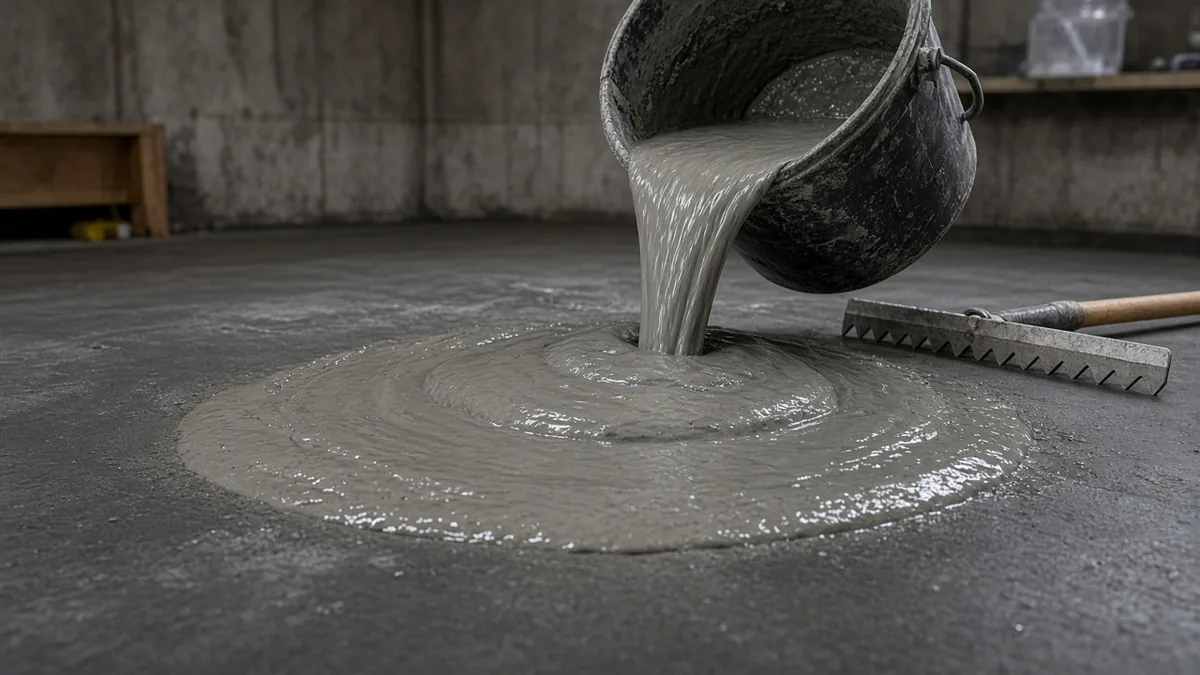
Self-leveling concrete is a cement-based pourable underlayment that flows out and finds its own level, giving you a flat, smooth floor without troweling. You mix it with water, pour it over a primed slab, and spread it lightly; most products can be walked on within a few hours to two days and covered with flooring soon after. This guide explains how self-leveling concrete works, where to use it, how thick it can go, how many bags you need, and the step-by-step pour.
It is the go-to fix for an uneven basement or garage floor before laying tile, vinyl plank or carpet. It is not a structural slab and not a replacement for a new pour. For a full new slab, start with our concrete slab calculator. If your slab has sunk or tilted rather than just needing a flat topping, see our guide to fixing uneven and sunken concrete floors.
Self-leveling concrete at a glance
| Question | Short answer |
|---|---|
| What is it? | A fluid, polymer-modified cement underlayment that flattens itself under gravity |
| Where does it go? | Indoor concrete floors (and some wood subfloors where the maker allows) before tile, vinyl, wood or carpet |
| Primer? | Always, using the primer the bag names |
| Water per bag | About 5 quarts for both QUIKRETE and Henry 555; never extra |
| Working time | About 10 to 20 minutes depending on product, so pour continuously |
| Max depth per layer | 5/8 in to 1-1/2 in depending on product |
| Walk on | 2 to 3 hours (Henry 555 at 70°F) up to 1 to 2 days (QUIKRETE standard) |
Fixing a floor that has sunk or a slab that rocks is a different job. Our concrete leveling guide compares grinding, resurfacing, mudjacking and foam lifting for uneven or sunken slabs. This page is only about the self-leveling product and how to pour it.
How does self-leveling concrete work?
Self-leveling products are not ordinary concrete. They are a blend of Portland cement, fine aggregate and polymers that make the mix very fluid without needing lots of extra water. When you pour it, gravity pulls it flat, much like water finding its level, and the polymers help it bond and cure without excessive shrinkage.
Because the mix is so fluid, it has a short working time. QUIKRETE says its Self-Leveling Floor Resurfacer stays fluid for about 20 minutes, and Henry 555 LevelPro lists a flow time of 10 minutes at 70°F. That is why the whole job has to be planned and poured in one continuous session.
Where to use self-leveling concrete
Good uses:
- Basement floors with dips, humps or old patched areas, before new flooring.
- Garage floors that need flattening before a finish, where the product data sheet allows that use.
- Kitchens and bathrooms before tile, so tiles sit flat and do not crack.
- Old concrete with a rough or damaged surface.
- Over wood subfloors, but only where the manufacturer allows it and usually with metal lath fixed down first.
Not a good fit:
- Outdoor slabs, patios and driveways, unless the product is specifically rated for exterior use. Most self-levelers are interior underlayments.
- Slabs that are cracking, heaving or sinking. Fix the cause first; a thin topping will crack along with the slab underneath.
- Very deep holes. Patch these first with a repair mortar.
Other indoor concrete projects include countertops and similar cast pieces. Want concrete above the floor too? Read our guide to DIY concrete countertops.
How thick can self-leveling concrete be?
Thickness limits vary a lot by product, so always check the bag and the technical data sheet. Two common examples:
| Product | Thinnest | Thickest in one pour | Walk on |
|---|---|---|---|
| QUIKRETE Self-Leveling Floor Resurfacer (1249-50) | feather edge | 5/8 inch per layer | 1-2 days |
| QUIKRETE Fast-Setting Self-Leveling (1249-51) | feather edge (1/4 inch in heavy traffic) | 1-1/2 inches per layer | about 6 hours |
| Henry 555 LevelPro (40 lb) | feather edge, 1/8 inch over high points | 1-1/2 inches neat | 2-3 hours at 70°F |
For deeper areas, the products either go on in layers, with primer between layers, or can be extended with pea gravel according to the instructions. Henry, for example, allows up to 5 inches with the right aggregate.
How much self-leveling concrete do you need?
Coverage depends on thickness. Use the manufacturer's figures:
- One 50 lb bag of QUIKRETE Self-Leveling Floor Resurfacer covers about 21 square feet at 1/4 inch, according to its data sheet.
- One 40 lb bag of Henry 555 LevelPro covers about 43 square feet at 1/8 inch.
Coverage halves each time the thickness doubles. Working from those two data-sheet figures:
| Average depth | QUIKRETE 50 lb bag (approx. sq ft) | Henry 555 40 lb bag (approx. sq ft) |
|---|---|---|
| 1/8 in | 42 | 43 |
| 1/4 in | 21 | 21.5 |
| 3/8 in | 14 | 14.3 |
| 1/2 in | 10.5 | 10.8 |
| 5/8 in | 8.4 | 8.6 |
| 1 in | Not in one layer (5/8 in max for the standard resurfacer) | 5.4 |
Values are scaled straight from each maker's stated coverage, so treat them as planning numbers and use the figure printed on your own bag.
Worked example: a 10 × 20 foot basement area (200 square feet) at an average of 1/4 inch:
- 200 ÷ 21 = 9.5 bags.
- Round up and add one for waste: 11 bags.
To check by volume: 200 sq ft × (0.25 ÷ 12) ft = 4.2 cubic feet. At about 0.45 cubic feet per bag, that is 9.3 bags before waste, which agrees. For thicker or uneven floors, measure the depth of the low spots and average it, or use our self-leveling concrete calculator.
Tools and materials checklist
- Self-leveling compound (enough bags plus one spare)
- The primer the manufacturer specifies
- Two or more 5-gallon buckets and a measuring jug for water
- Heavy-duty 1/2-inch drill (650 RPM or more) with a mixing paddle
- Gauge rake or spreader, and a smoother
- Spiked shoes or cleats so you can walk on the wet pour
- Foam or caulk to seal gaps and form dams
- Shop vacuum, scraper, and a grinder or scarifier for prep
- Dust mask or respirator, gloves and eye protection
How to pour self-leveling concrete, step by step
Step 1: Repair and clean the floor
Fill large holes and cracks first. QUIKRETE asks for holes deeper than 1 inch to be repaired with a repair mortar and left to cure overnight. Then remove dirt, dust, oil, grease, paint and sealers. QUIKRETE notes that acid etching, solvents and sanding are not acceptable preparation for its product, so mechanical cleaning such as grinding or scraping is the usual route.
Step 2: Seal gaps and build dams
The mix is runny enough to flow into floor drains, gaps at walls and doorways. Seal perimeter gaps with foam or caulk and build dams across doorways that stand higher than the finished floor.
Step 3: Prime
Primer is not optional. It stops the slab from sucking water out of the mix and helps the topping bond. QUIKRETE uses its Concrete Bonding Adhesive diluted 1 part to 2 parts water, with two coats on old, porous concrete; let it dry to the touch, about 1 to 2 hours. Henry specifies its own 554 primer. Use the primer the manufacturer names.
Step 4: Mix in batches
Always add powder to water, not water to powder. Both QUIKRETE and Henry call for about 5 quarts of water per bag. Mix with the drill and paddle until smooth and lump-free: QUIKRETE says at least 4 minutes, Henry 2 minutes. Do not add extra water. Over-watering weakens the topping and can cause separation, shrinkage and a dusty surface.
Step 5: Pour in strips and keep a wet edge
Start at the far side of the room. Pour in strips about a foot wide across the narrow side of the space, and pour each new strip against the last one while it is still wet. QUIKRETE recommends placing adjacent strips within 15 to 20 minutes. A helper mixing the next bucket while you pour makes this much easier.
Step 6: Spread and smooth
Use the gauge rake to push the mix into place at the right depth, then pass the smoother lightly over it to remove ridges and help air escape. Wear spiked shoes so you do not leave footprints.
Step 7: Let it cure and test before flooring
Keep traffic off the floor until the product's walk-on time. Before laying flooring, check moisture: QUIKRETE suggests taping a square of plastic sheeting to the surface and checking under it after several hours. If there is condensation, wait longer. Always follow your flooring maker's moisture limits.
Once the floor is level and cured, you can coat the floor with epoxy or another coating.
How long does self-leveling concrete take to dry?
| Product | Walk on | Flooring |
|---|---|---|
| QUIKRETE Self-Leveling Floor Resurfacer | 1-2 days | after moisture test |
| QUIKRETE Fast-Setting Self-Leveling | about 6 hours | 24-48 hours |
| Henry 555 LevelPro | 2-3 hours at 70°F | 6 hours for tile, 16 hours for other floor coverings |
Cold rooms slow everything down. If a basement is cold, warm it before and during the cure. Our guide to pouring concrete in cold weather explains why temperature matters.
Concrete floor leveling indoors
Searches for concrete floor leveling or slab leveling indoors usually mean flattening a sound slab before flooring—not lifting a sunken patio. Map the room with a long straightedge, grind stubborn high spots, fill deep pockets with repair mortar, then pour self-leveler over the lows. If one corner of the building has dropped or the slab rocks, the structural fix is mudjacking or foam lifting; a topping will crack with a moving base.
Worked coverage check: a 12 × 15 ft laundry room (180 ft²) at an average 1/4 in depth needs about 180 ÷ 21 ≈ 9 bags of 50 lb QUIKRETE resurfacer before waste—confirm with the self-leveling concrete calculator.
Common self-leveling mistakes
- Skipping primer. The most common cause of pinholes, bubbles and poor bonding.
- Too much water. It flows nicely but cures weak and dusty.
- Mixing too slowly. The first strip starts to set before the next one arrives, leaving visible lines.
- No dams. The mix escapes under doors and into drains.
- Pouring over a moving slab. Cracks in the base come straight through.
- Walking on it too soon. Wait for the stated walk-on time.
Self-leveling concrete vs other fixes
| Problem | Best fix |
|---|---|
| Dips and humps under new flooring | Self-leveling underlayment |
| Small cracks in a sound slab | Crack filler; see how to fix cracks in concrete |
| Badly broken or sinking slab | Remove and pour a new slab |
| Outdoor surface that looks worn | Exterior-rated resurfacer or a sealer |
Safety
Cement products are alkaline and can irritate skin and eyes, and mixing powder raises fine dust. Wear gloves, eye protection and a dust mask or respirator, mix in a ventilated space, and keep dust down during grinding. OSHA has guidance on controlling crystalline silica dust from cutting and grinding concrete.
Default yield is a planning figure (~0.45 ft³ for many 50 lb self-levelers at ¼ in). Check your bag label.
Bags to buy (rounded up)
10bags
Add one spare bag for waste on the first pour.
Frequently asked questions
What is concrete floor or slab leveling?
Indoor floor leveling on a sound slab usually means grinding highs and filling lows with patch or self-leveling underlayment—not lifting the whole slab. If the section has dropped or rocks, that is mudjacking or foam lifting; see our concrete leveling guide instead of pouring a topping.
What is self-leveling concrete used for?
It is used to flatten and smooth indoor floors before laying tile, vinyl, wood or carpet. It fixes dips and humps in basements, garages and kitchens, but it is not a structural slab.
How thick can you pour self-leveling concrete?
It depends on the product. QUIKRETE's standard resurfacer goes up to 5/8 inch per layer, while its fast-setting version and Henry 555 go up to 1-1/2 inches in one pour.
Do you need to prime before self-leveling concrete?
Yes. Primer stops the slab from absorbing water from the mix and helps the topping bond. Use the primer the manufacturer specifies and let it dry first.
How long before you can walk on self-leveling concrete?
Fast products such as Henry 555 can be walked on in 2 to 3 hours at 70°F. QUIKRETE's standard self-leveling resurfacer needs 1 to 2 days.
Can you use self-leveling concrete outside?
Most self-leveling products are for interior use only. For a patio or driveway, use a product the manufacturer rates for exterior use.
How many bags of self-leveling concrete do I need?
One 50 lb QUIKRETE bag covers about 21 sq ft at 1/4 in (1249-50 data sheet). Use the self-leveling concrete calculator with your floor area and average depth; add one spare bag for waste.
Is self-leveling concrete the same as concrete leveling?
No. Self-leveling is a pourable underlayment on a sound slab. Concrete leveling usually means lifting a sunken slab (mudjacking or foam) or grinding—see our concrete leveling guide if the floor has dropped.
Can you pour self-leveler over paint or sealer?
Not as a rule. QUIKRETE asks for paint, sealers, oil and dust to be removed by mechanical means such as grinding or scraping before priming. Check your product's data sheet for what it can bond to.
- https://www.quikrete.com/pdfs/data_sheet-self-leveling%20floor%20resurfacer%201249-50%20-51.pdf
- https://www.wwhenry.com/wp-content/uploads/2025/10/Henry-555-Tech-Data.pdf
- https://www.osha.gov/silica-crystalline