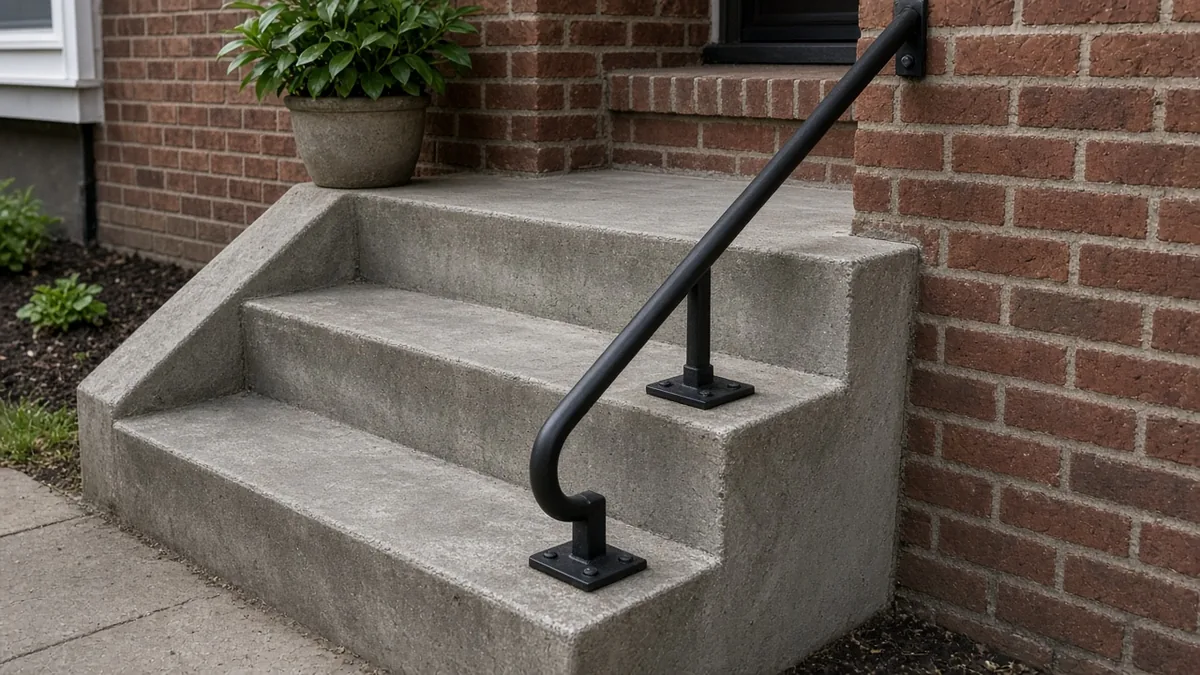
A handrail for concrete steps is usually a metal or aluminum railing fastened to the concrete with base plates and anchors, or with posts set into holes drilled in the steps. Under the model residential code used in most of the US, any flight with four or more risers needs a handrail on at least one side, mounted 34 to 38 inches above the line of the step noses. Even a two- or three-step entry is safer with one.
This guide covers the code basics, the two main ways to mount a rail on concrete, and a step-by-step install that stays tight for years. If you are still building the steps, read how to pour concrete steps first, because planning for the rail before the pour makes the job easier.
Do concrete steps need a handrail?
The International Residential Code (IRC), which most US towns adopt with local changes, says a handrail is required on at least one side of each flight with four or more risers. A riser is the vertical face of each step, so a flight of four steps up to a porch usually counts.
Fewer than four risers usually does not trigger the rule, but that is a minimum, not advice. Steps get icy, people carry groceries, and older relatives and small children use them. A rail on short steps costs little and prevents a lot of falls.
Codes change and towns add their own amendments, so call your local building department before you buy materials. Ask two things: whether a permit is needed for a rail on existing steps, and which code edition they follow.
Handrail height and code basics
These figures come from the IRC handrail section (R311.7.8). Your local version may differ slightly.
| Item | Typical residential requirement |
|---|---|
| When required | Flights with 4 or more risers, at least one side |
| Height | 34 to 38 inches, measured straight up from the line connecting the step noses |
| Length | Continuous from above the top riser to above the bottom riser |
| Ends | Returned toward a wall or post, or ending in a post |
| Wall clearance | At least 1-1/2 inches between rail and wall |
| Grip size (round) | 1-1/4 to 2 inches across |
| Grip size (other shapes) | 4 to 6-1/4 inch perimeter, no more than 2-1/4 inches across |
The height measurement trips people up. You do not measure from the middle of a tread. Picture a straight line touching the front edge (nosing) of every step, then measure up from that sloped line to the top of the rail.
Guards are a separate rule. If the side of your landing or steps is more than 30 inches above the ground, codes usually require a guard with balusters as well as a graspable handrail. Most low entry steps do not reach that height, but tall porches can.
Surface-mount railing on concrete
Surface mounting is the most common choice for existing steps. Each post has a flat base plate with holes, and you fasten the plate to the concrete with anchors.
Pros:
- No large holes to drill
- Works on most sound concrete
- Easy to replace a post later
Cons:
- Anchors near an edge can crack the concrete if placed or tightened wrongly
- Base plates sit on top of the surface and can collect water
Use the anchors the railing maker recommends. Wedge anchors and sleeve anchors are common mechanical anchors. Adhesive anchors, which set a threaded rod in epoxy, put less outward pressure on the concrete and are often preferred near edges. Whatever you choose, follow the anchor maker's minimum distance from the edge, embedment depth and torque. Those numbers are printed on the package for a reason.
Core drill railing posts
Core drilling means boring a round hole into the step, standing the post in it and filling the gap with anchoring cement or epoxy grout.
Pros:
- Clean look with no base plate
- Very solid when done well
- Less edge stress than some expansion anchors
Cons:
- Needs a core drill (rentable) and a steady hand
- Hard to adjust once set
- Hits rebar more often than small anchor holes
Core drilling suits thick steps and new work. It is also the method that benefits most from planning ahead. If you are pouring new steps, you can set plastic or metal sleeves in the wet concrete where posts will go, then drop the posts in later.
Tools and materials
- Railing kit or posts, rails and brackets sized for your steps
- Base plates or post sleeves
- Concrete anchors or epoxy and threaded rod, as specified by the railing maker
- Hammer drill with a masonry bit of the anchor's exact diameter (or a rented core drill)
- Shop vacuum and a wire brush or blow-out bulb to clean holes
- Level, tape measure, chalk line or string, marker
- Torque wrench for mechanical anchors
- Hacksaw or metal cutting blade if rails need trimming
- Safety glasses, dust mask and hearing protection
How to install a handrail on concrete steps
- Check the concrete. Look for cracks, crumbling edges or loose patches where posts will go. Repair first. Our guide to patching concrete steps covers worn edges and broken nosings.
- Plan the post layout. Most kits want a post at the top landing, one at or near the bottom step and one in between on longer runs. Keep posts back from the edge by at least the anchor maker's minimum distance. Mark centers with a marker.
- Snap the nosing line. Run a string from the top nosing to the bottom nosing. You will measure rail height from this line.
- Drill the holes. Use the exact bit size listed for the anchor. Drill straight and to the listed depth. If you hit rebar, stop and move the hole slightly rather than forcing the bit.
- Clean every hole. Vacuum and brush out the dust. Dust left in a hole is the most common reason anchors pull out, especially adhesive anchors.
- Set the posts. For surface mount, place the plate, insert anchors and tighten to the listed torque. For core-drilled posts, stand the post, plumb it, and fill with anchoring cement or epoxy grout. Brace it until the product cures.
- Fit the rail. Attach the rail to the posts at a height between 34 and 38 inches above the nosing line. Check that it runs continuously from above the top riser to above the bottom riser.
- Finish the ends. Return the rail ends toward a wall or post, or end them at posts, so sleeves and bags cannot snag.
- Seal around the base. A bead of exterior sealant around base plates keeps water out. For core-drilled posts, slope the grout so water runs away from the post.
Give adhesive anchors and anchoring cement their full cure time before anyone leans on the rail.
Mistakes when adding a handrail for concrete steps
- Drilling too close to the edge. This is the main cause of cracked step corners. Respect the edge distance on the anchor package.
- Over-tightening wedge anchors. More torque is not more strength. It can split the concrete.
- Measuring height from the tread center. Measure from the nosing line.
- Skipping hole cleaning. Dusty holes give weak anchors.
- Mounting on a cracked or patched edge. Fix the concrete first, then anchor into sound material.
- Leaving gaps that trap water. Freeze-thaw cycles can work water into the concrete around posts.
If the steps themselves are new, wait until the concrete has cured properly before drilling. Our guide on when you can drill into new concrete explains the timing.
Precast steps and older steps
Precast concrete steps often come with optional rail pockets or a railing package from the same supplier. Ask before you buy, because a matching kit saves drilling. If you add a rail later, the same anchor rules apply.
On older poured steps, test a small hole first. Soft or crumbling concrete holds anchors poorly. In that case, consider repairing the step, resurfacing it, or mounting posts in new footings beside the steps instead of on them.
For a new flight, size it with the concrete step calculator and plan the rail before you pour.
Frequently asked questions
How high should a handrail be on concrete steps?
Under the IRC, residential handrails go 34 to 38 inches above the sloped line that connects the front edges of the steps. Check your local code, which may add its own rules.
Do 3 concrete steps need a handrail?
The model code requires a handrail on flights with four or more risers, so three steps usually do not need one by code. A rail is still a sensible safety upgrade, especially in icy climates.
What anchors should I use for a railing on concrete?
Use the type and size the railing maker specifies. Wedge, sleeve and adhesive anchors are common. Adhesive anchors put less outward stress on concrete near edges. Always follow the anchor's edge distance, depth and torque.
Is surface mount or core drilling better?
Surface mount is easier for existing steps and needs only small holes. Core drilling gives a cleaner look and very solid posts but needs a core drill and careful setup. Both work when done to the product instructions.
Can I install a handrail on new concrete steps right away?
Wait until the concrete has cured enough to drill and hold anchors, and follow the anchor maker's minimum concrete age if it lists one. Planning sleeves into the pour avoids drilling later.
Do I need a permit to add a railing to my steps?
It depends on your town. Some require a permit for any railing work and some do not. Call the local building department before you start.