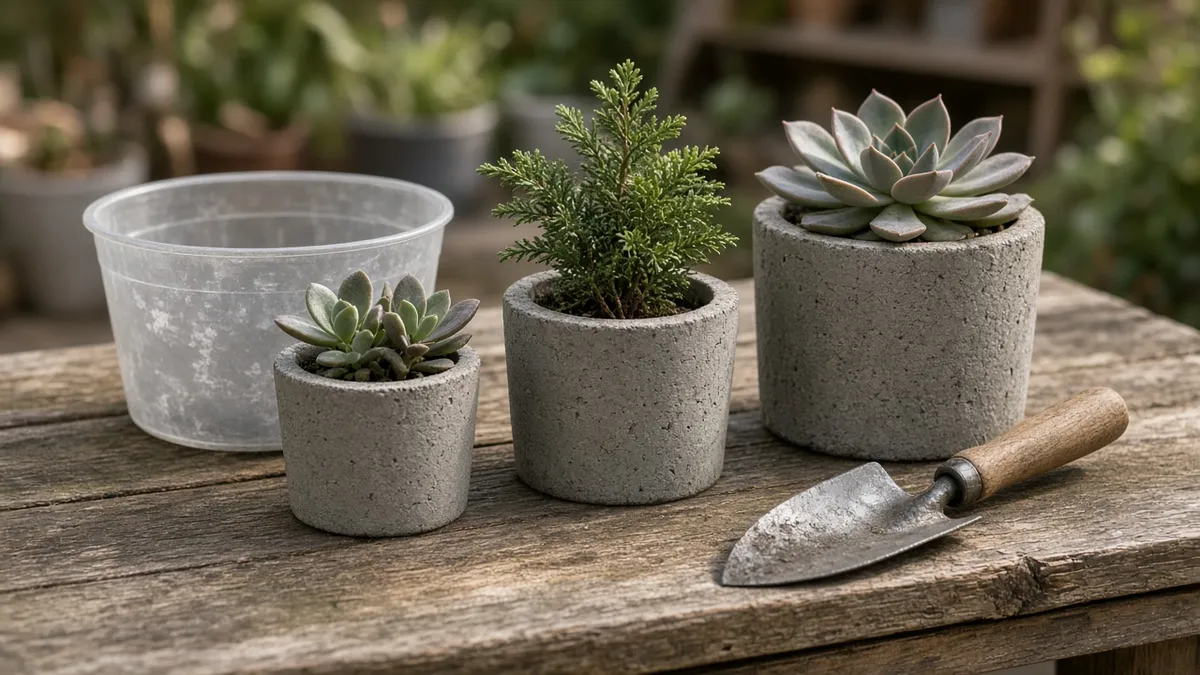
DIY concrete planters are one of the easiest ways to try concrete without pouring a slab. You need a bag of mix, two containers that nest inside each other, some cooking oil or release agent, and a short dowel for the drainage hole. Pour a base, set the inner form, fill the gap, tamp out the air, then wait. In about a day you can pop the planter out of the mold, and after a few more days of damp curing it is ready for soil. This guide covers the mix, the molds, the steps and the mistakes that crack or stain a first planter.
Because it is the season for handmade gifts, we also cover how to make a set of small pots in one weekend and how to finish them so they look store-bought.
What you need
| Item | Why |
|---|---|
| Bag mix (see the next section) | One 50 or 80 lb bag makes several small pots or one large planter |
| Outer mold | Laundry basket, plastic bucket, storage tub, cardboard box or wood form |
| Inner mold | A smaller container that leaves about 1 in. of wall all round |
| Cooking spray, vegetable oil or form release | So the concrete lets go of the molds |
| Short dowel or wine cork | Forms the drainage hole |
| Sand, gravel or rocks | Weighs down the inner mold so it does not float |
| Mixing tub, trowel, dust mask, gloves and safety glasses | Wet cement is caustic and dry mix is dusty |
| Plastic bag or sheet | Keeps the planter damp while it cures |
If you have never mixed a batch by hand, read how to mix concrete in a wheelbarrow first. The same rules apply in a small tub: add water slowly and stop when the mix holds its shape.
The best concrete mix for planters
The right bag depends on the size of the pot and the look you want.
- Sand mix (sand/topping mix): no gravel, so it fills thin walls and gives a smooth, fine surface. This is the usual choice for small and medium pots with walls under about 1.5 in.
- Crack-resistant or regular concrete mix: contains gravel, so it is stronger in thick sections. Use it for large planters with walls of 2 in. or more.
- Quick-setting cement: sets fast, which is handy for small cast pieces, but you have less time to fill the mold.
Quikrete's own cast concrete planters guide lists its crack-resistant concrete mix, sand/topping mix and quick-setting cement as planter materials, which matches that split.
To estimate the amount, work out the volume of the walls and base rather than the whole pot. The quick way: fill the outer mold with water, measure it, then subtract the water the inner mold holds. For anything larger than a few pots, our concrete bag calculator turns the volume into bag counts. Buy one more bag than you need; running out halfway through a pour leaves a weak seam.
Choosing molds
Almost any smooth container can be a mold. A few favorites:
- Laundry basket: the trend this fall. The basket's holes and ribs press a woven pattern into the outside of the planter. Line the inside with packing tape if you want fewer holes, or leave it bare and oil it well for a stronger texture. A tall rectangular basket makes a planter large enough for a small shrub.
- Plastic buckets and tubs: simple round or square shapes with smooth walls. Flexible plastic is easier to demold than rigid plastic.
- Cardboard boxes: good for crisp square planters. Tape the seams and wrap the outside with tape so the box does not bulge.
- Wood forms: best for large rectangular planters. Oil the inside and screw the sides together so you can unscrew them later.
- Food containers and yogurt pots: perfect for small succulent pots and gift sets.
The inner mold should leave a wall of about 1 in. for small pots and 1.5 to 2 in. for large ones. Thin walls look elegant but crack more easily.
How to make a concrete planter, step by step
- Prepare the molds. Coat the inside of the outer mold and the outside of the inner mold with oil or form release. Do not leave puddles, which cause pits on the surface.
- Make the drainage hole. Oil a short dowel or a cork. You will push it into the base layer so it reaches the bottom of the outer mold. Quikrete's guide suggests a 1/2 in. hole plugged with an oiled dowel.
- Mix the concrete. Mix in a tub to a thick, oatmeal-like consistency. Too wet and it will be weak and shrink; too dry and it will not fill the mold.
- Pour the base. Add about 1 to 1.5 in. of concrete to the bottom of the outer mold and press the dowel down through it.
- Set the inner mold. Push the inner mold down onto the base, center it, and fill it with sand, gravel or rocks so it stays put.
- Fill the walls. Spoon concrete into the gap a little at a time. Tap the sides of the mold, or tamp with a stick, to release air bubbles. This step decides how smooth the planter looks.
- Level the top. Strike off the rim with a trowel or a flat stick and smooth it.
- Cover and wait. Cover with a plastic bag and leave the planter somewhere sheltered.
Demolding and curing
Most small planters can come out of their molds after about 24 hours. Pull the inner mold first, twisting it gently, then flex or cut the outer mold away. Remove the dowel with a twist. If the concrete still feels soft or crumbles at the edge, wait another day.
Removing the mold is not the end. Quikrete recommends letting a cast planter cure for 3 to 4 days before you use it, and the concrete keeps gaining strength for weeks after that. Keep the planter damp during that time: mist it once or twice a day and keep it under a plastic bag. A planter that dries out fast in a warm house or in wind is far more likely to craze or crack.
Cold matters too. Concrete cures slowly in the cold and can be damaged if it freezes while fresh, so in late fall cast your planters in a heated garage or basement. Our cold-weather concrete guide explains why temperature matters so much.
Finishing touches
Once the planter has cured, you can make it look more finished:
- Sand the edges. Use a sanding sponge or 120-grit paper to soften the rim. Wear a dust mask.
- Fill bubbles. Mix a little cement paste and rub it into pinholes, then wipe off the surface.
- Paint or color. Masonry paint, chalk paint or a gold leaf rim all work well. You can also add liquid cement color to the mix before you pour. Our concrete patio painting guide covers primers and paint types for concrete.
- Seal. A clear masonry sealer slows water staining on the outside and is handy for indoor planters that sit on furniture. Leave the inside unsealed, or follow the sealer maker's guidance.
- Add felt pads. Stick felt dots under indoor planters so they do not scratch shelves.
Before you plant
Fresh concrete is highly alkaline. Many makers rinse a new planter, or let it sit outdoors in the rain for a few weeks, before planting anything delicate. Succulents, cacti, herbs such as rosemary and hardy evergreens are forgiving first choices. Always keep the drainage hole open; standing water is the most common reason plants fail in concrete pots.
If the pot will live outdoors through winter, make sure water can drain out of it and lift it on pot feet. Water trapped in a pot that freezes expands and can crack the walls.
Laundry basket planter: a quick plan
For the trending laundry basket look, use a sturdy plastic basket with an open pattern and a bucket or smaller tub as the inner mold.
- Oil the inside of the basket generously.
- Set the basket on a flat board covered with plastic, because concrete will seep through the holes at the bottom.
- Pour a 2 in. base, add the drainage dowel and press in the oiled inner tub weighed down with gravel.
- Fill the sides in layers, tapping the basket after each layer.
- Demold after 24 to 48 hours by pulling the basket away from the planter. Some baskets need to be cut off; buy a cheap one you do not mind losing.
A full-size basket planter can weigh well over 100 pounds once it is full of soil, so cast it close to where it will live, or use a dolly.
Common mistakes
- Mix too wet. Weak, dusty concrete with shrinkage cracks. Add water a little at a time.
- Walls too thin. Cracks at the rim. Keep at least 1 in. of wall.
- No release agent. The planter sticks and chips when you demold.
- Skipping the drainage hole. Drilling one later is harder and risks cracking the pot.
- Demolding too early. Edges crumble. Wait a full day or more.
- Drying too fast. Surface crazing. Keep it covered and damp.
Safety
Wet cement can irritate and burn skin, so wear gloves and long sleeves. Wear safety glasses when mixing and a dust mask when pouring dry mix or sanding. Wash skin promptly if wet concrete gets on it. Keep children and pets away from the mixing area.
Turning planters into holiday gifts
Small concrete pots make simple gifts. Cast a set of three in yogurt-pot molds, paint the rims, plant a succulent or a sprig of rosemary, and wrap each one in kraft paper. Start at least a week before you plan to give them, so the pots have time to cure and the plants can settle in.
For bigger projects in spring, such as a concrete step or a pad for planters, start with our concrete calculator.
Have leftover mix? Cast a few concrete stepping stones with the same bag.
Frequently asked questions
What is the best concrete mix for DIY planters?
For small pots with thin walls, use a sand mix (sand/topping mix) because it has no gravel and fills the mold smoothly. For large planters with walls of 2 in. or more, a regular or crack-resistant concrete mix is stronger.
How do you make a concrete planter with a laundry basket?
Oil the inside of a plastic laundry basket, pour a base layer, add an oiled dowel for drainage and press in a smaller weighted tub as the inner mold. Fill the sides in layers, tap out the air, cover it and demold after 24 to 48 hours.
How long should a concrete planter cure before planting?
Most small planters can be demolded after about 24 hours. Quikrete recommends curing a cast planter for 3 to 4 days before use. Many makers also rinse or weather the pot for a while before planting delicate plants.
Do concrete planters need drainage holes?
Yes. Without a drainage hole, water collects and can rot roots, and outdoors it can freeze and crack the pot. The easiest way is to cast the hole with an oiled dowel or cork during the pour.
How thick should the walls of a concrete planter be?
About 1 in. for small pots and 1.5 to 2 in. for large planters. Thinner walls look delicate but crack more easily, especially at the rim.
Can you make concrete planters in cold weather?
Yes, but cast them indoors in a heated garage or basement. Concrete cures slowly in the cold and fresh concrete can be damaged if it freezes, so keep the planters warm and damp while they cure.
- https://www.quikrete.com/pdfs/projects/castconcreteplanters.pdf