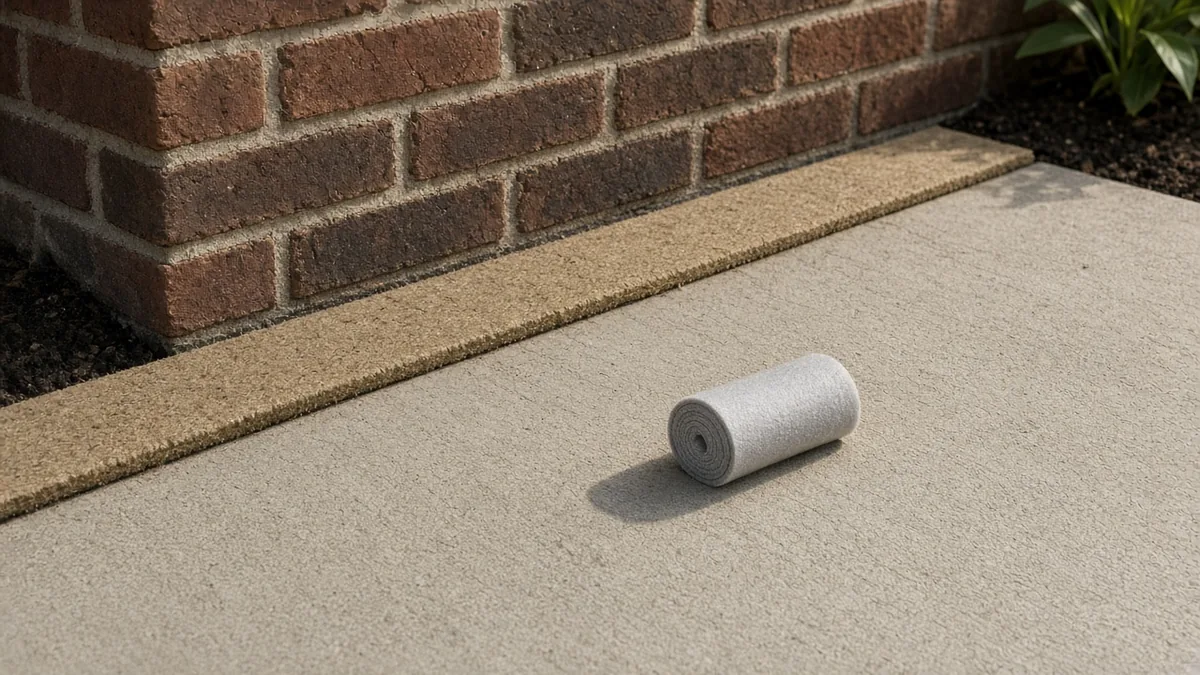
Concrete expansion joints are the full-depth gaps that keep a new slab from bearing against a house wall, a deck post, a pipe or an older piece of concrete. You fill that gap with a compressible strip — usually foam or fiberboard — so the slab can move a little as it shrinks, expands and settles. In many professional guides the same detail is called an isolation joint. Homeowners still search for it as an expansion joint, and the job is the same: separate the slab from something that should not be bonded to it.
This is different from a control joint, the shallow groove that tells shrinkage cracks where to run. Most patios and driveways need both: isolation at the house and posts, control joints in the field of the slab. Mixing the two names is how people end up filling a useful gap with mortar, or skipping the wall joint entirely. The steps below keep the terms straight and show how to place, pour and seal the joint on a typical residential slab. This is general guidance, not a substitute for local code or a licensed professional on a structural or unusual job.
Expansion joints and control joints are not the same
Concrete shrinks as it dries and hardens. It also moves a little with temperature. If a new slab is poured tight to a foundation, a steel post or an old driveway, that movement has nowhere to go. The edge can crush, the wall can take a load it was not meant to take, or a crack can run from the hard point into the slab.
| Joint | Depth | What it is for | Typical location |
|---|---|---|---|
| Control or contraction joint | Partial depth, often about one-quarter of the slab thickness | Guides shrinkage cracks along a planned line | A grid across walkways, patios and driveways |
| Expansion or isolation joint | Full depth, with compressible filler | Separates the slab from a building, post, wall or existing concrete | Where new concrete meets a fixed object |
A control joint is a weak plane. You tool it in while the concrete is plastic, or you saw-cut it later, so a crack forms at the bottom of the groove instead of at random. An isolation joint is a break. The filler occupies the full thickness so the two sides are not one piece of concrete.
If a crack already wandered across a slab, that is a different problem. See how to fix cracks in concrete. A joint planned at pour time is cheaper than a repair later.
Where an isolation joint belongs
Place a full-depth compressible joint wherever new concrete meets a fixed structure:
- Against a house foundation or garage wall
- Around a deck post, lamp post, or column that passes through the slab
- Against an existing driveway, sidewalk or patio you are not bonding to
- Around pipes, drains or cleanouts that come up through the pour
- At a set of steps where the landing meets a wall, when the plan calls for a break
You do not usually need a mid-slab “expansion joint” on a typical backyard patio or short walk. What you need in the field is a sensible control-joint layout. A common guideline for a 4-inch unreinforced slab is to space those contraction joints about 8 to 12 feet apart, often described as 24 to 36 times the slab thickness. Treat that as guidance, not a building-code rule. Local codes, reinforcement, mix, weather and slab shape all matter. Long, narrow walkways often get joints at regular intervals and at changes of direction. A small slab may need only the isolation at the house plus one or two control joints.
If the plans or a ready-mix supplier specify joint spacing, follow that. If the layout is unclear on a large or odd-shaped pour, get help before you place the concrete.
Materials: filler and sealant
The filler has to compress. Typical residential materials are:
- Preformed foam joint filler, often 1/2 inch thick, sold in strips you can cut to depth
- Asphalt-impregnated fiberboard, also commonly 1/2 inch, for a stiffer strip that still compresses
Cut the strip to the full depth of the slab, or slightly taller if you will trim it flush after the pour. A 4-inch slab needs a 4-inch (or slightly taller) strip, not a shallow ribbon stuck on the surface. If concrete runs under the filler, you have built a bridge and lost the joint.
At the top, plan on a flexible sealant made for concrete joints after the slab has cured enough for the product you choose. The sealant keeps water, dirt and deicers out of the gap. Do not fill the joint with mortar, leftover mix, grout or a rigid patch. That turns the isolation joint back into a solid connection.
Some details use a removable cap or a recess so the sealant has a clean slot. Follow the filler and sealant directions for depth and backer rod. A neat, slightly recessed bead looks better and lasts longer than a smear across the slab.
How to install the joint before you pour
- Prepare the base as you would for any slab: grade, compact and set forms. Use a slab calculator so the thickness you planned is the thickness you pour.
- Stand the filler against the wall, post or existing concrete before the pour. It should sit plumb, tight to the structure, and run the full length of the meeting line. Fasten or stake it so it cannot lean when concrete lands against it.
- Check the height. The top of the filler should finish flush with the slab, or a little high if you will trim it. It must reach the base so the pour cannot sneak under.
- Place and consolidate the concrete without knocking the strip over. Spade or vibrate carefully along the joint. If the filler leans, stand it back up before the mix stiffens.
- Finish the slab — strike off, float, edge and broom as planned — without dragging paste over the top of the filler. Keep the joint visible and clean.
- Cure the slab, including in cold weather, then install the flexible sealant when the product allows.
Around a post, wrap the filler so it meets itself and leaves no concrete-to-post contact. Around a pipe, use a sleeve or filler made for that penetration. Do not rely on a smear of form oil as the isolation; use a real compressible material.
Common mistakes
- No joint at the house. The slab is poured tight to the foundation. Months later the edge spalls, or a crack runs out from the wall.
- Filler only at the top. Concrete meets the wall below the strip and the joint does nothing.
- Filler knocked over during the pour. The gap becomes a random, broken line, or disappears.
- Filled later with mortar “to make it look finished.” The joint is now rigid.
- No sealant. Water sits in the gap, dirt packs in, and freeze-thaw works on both edges.
- Treating isolation and control joints as interchangeable. A saw cut in the middle of a patio does not isolate the foundation. A foam strip at the wall does not replace a joint grid in a wide driveway.
If you already have a packed, unsound, or mortar-filled gap against a wall, saw or scrape out the rigid material, clean the slot, set new filler or backer as the depth allows, and seal with a flexible joint sealant. If the slab edge is broken, repair the concrete first, then rebuild the joint. Widespread surface damage is a different job; see how to resurface concrete only after the edge is sound.
A simple layout to aim for
For a typical backyard patio that meets the house:
- Isolation joint, full depth, along the foundation
- Isolation around any post or pipe that comes through the slab
- Control joints in the field, in squares or rectangles as even as the shape allows, using the spacing guideline above unless the plans say otherwise
- Joints aligned with corners, steps and changes of width where you can
For a walkway, isolate at the porch or garage slab, then add control joints at regular intervals and at turns. For a driveway that meets a garage floor or an older public sidewalk, isolate at that meeting line unless the plan calls for a bonded connection, which is a different detail.
Joints are part of the pour, not an optional trim. Set the filler before the truck arrives, keep it standing during the place, and seal it after the slab has cured. That short sequence prevents a surprising number of edge cracks.
A quick review
- Use a full-depth compressible filler where new concrete meets a building, post or existing slab.
- Use partial-depth control joints in the field to guide shrinkage cracks.
- A common filler thickness is 1/2 inch; it must run the full depth of the pour.
- Do not fill the joint with mortar or leftover concrete. Use a flexible sealant at the top.
- Treat spacing figures as guidance and follow local code and the project plans.
If you are pouring for the first time, mark the isolation lines on the forms the day before, cut the filler to length, and dry-fit it. The pour goes quickly. The joint has to be ready when the concrete is.
Frequently asked questions
What is a concrete expansion joint?
In everyday use, an expansion joint is a full-depth gap filled with a compressible material where a new slab meets a building, a post, a wall or existing concrete. In many professional guides this detail is also called an isolation joint. It lets the slab move without pushing on the fixed structure.
What is the difference between an expansion joint and a control joint?
A control joint, also called a contraction joint, is a partial-depth groove that tells shrinkage cracks where to run. An expansion or isolation joint is a full-depth filler that separates the slab from something that should not be bonded to it. Most patio and driveway interiors need control joints; the edge against the house usually needs isolation.
How thick should the filler be?
A common residential filler is a 1/2-inch-thick foam or fiberboard strip, cut to the full depth of the slab. Follow the product and the project plans if they specify a different thickness. The filler should run the full depth so concrete cannot bridge under or over it.
How far apart should joints be?
For contraction joints in a typical 4-inch unreinforced slab, a common guideline is about 8 to 12 feet, often described as 24 to 36 times the slab thickness. Treat that as guidance, not a building-code rule. Check your local code and the plans. Isolation joints go where the slab meets a fixed object, not on a fixed grid.
Can I fill an expansion joint with mortar or more concrete?
No. A rigid fill defeats the joint. Use a compressible filler and, at the top, a flexible sealant made for concrete joints. Mortar, grout or a smear of leftover mix will lock the two sides together again.
Do I need expansion joints in the middle of a patio?
Usually you need control joints in the field of the slab and isolation joints at buildings, posts and existing concrete. A mid-slab “expansion joint” is not a substitute for a planned contraction-joint layout. If a slab is large or meets several structures, follow the plans or ask a professional.